ARE IRON SIGHTS OBSOLETE?

Magnifying riflescopes aren’t new. Limited use in the American Civil War, and a few bison hunters used scopes in the 1870s. Scopes improved and became more popular in the 20th Century, but only came into widespread use after WWII.

By Craig Boddington

ARE IRON SIGHTS OBSOLETE?

Magnifying riflescopes aren’t new. Limited use in the American Civil War, and a few bison hunters used scopes in the 1870s. Scopes improved and became more popular in the 20th Century, but only came into widespread use after WWII.

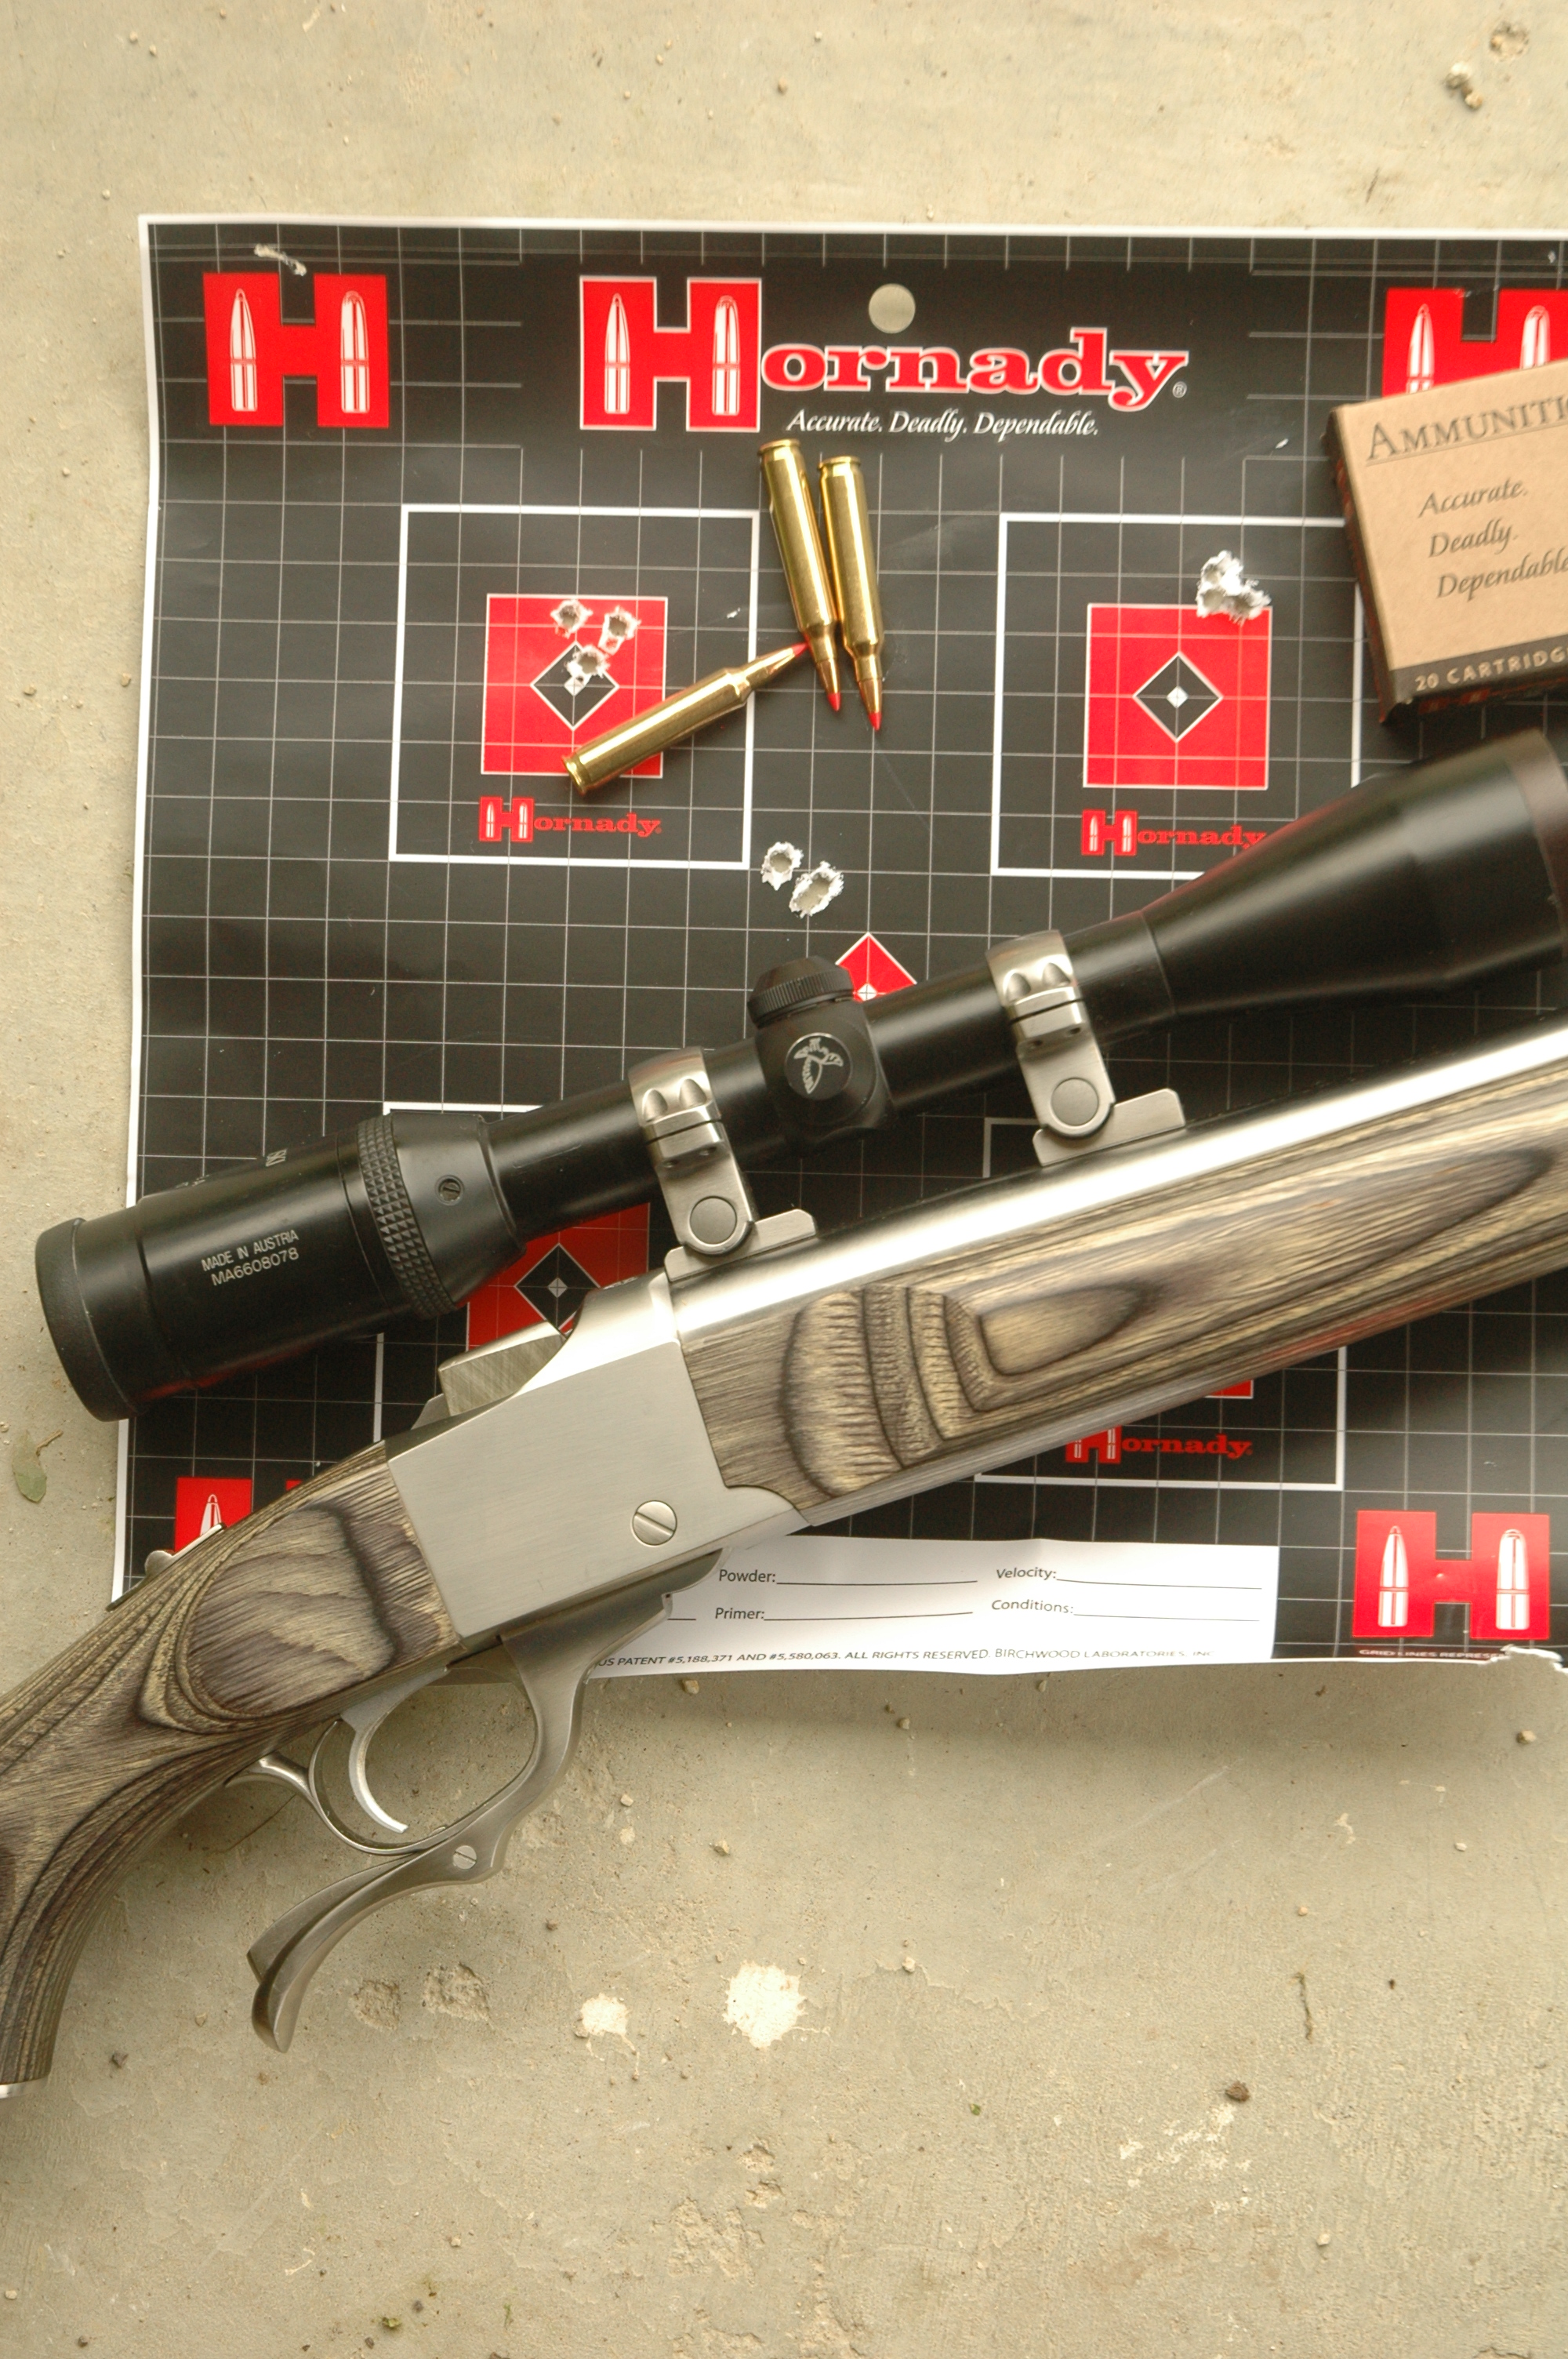
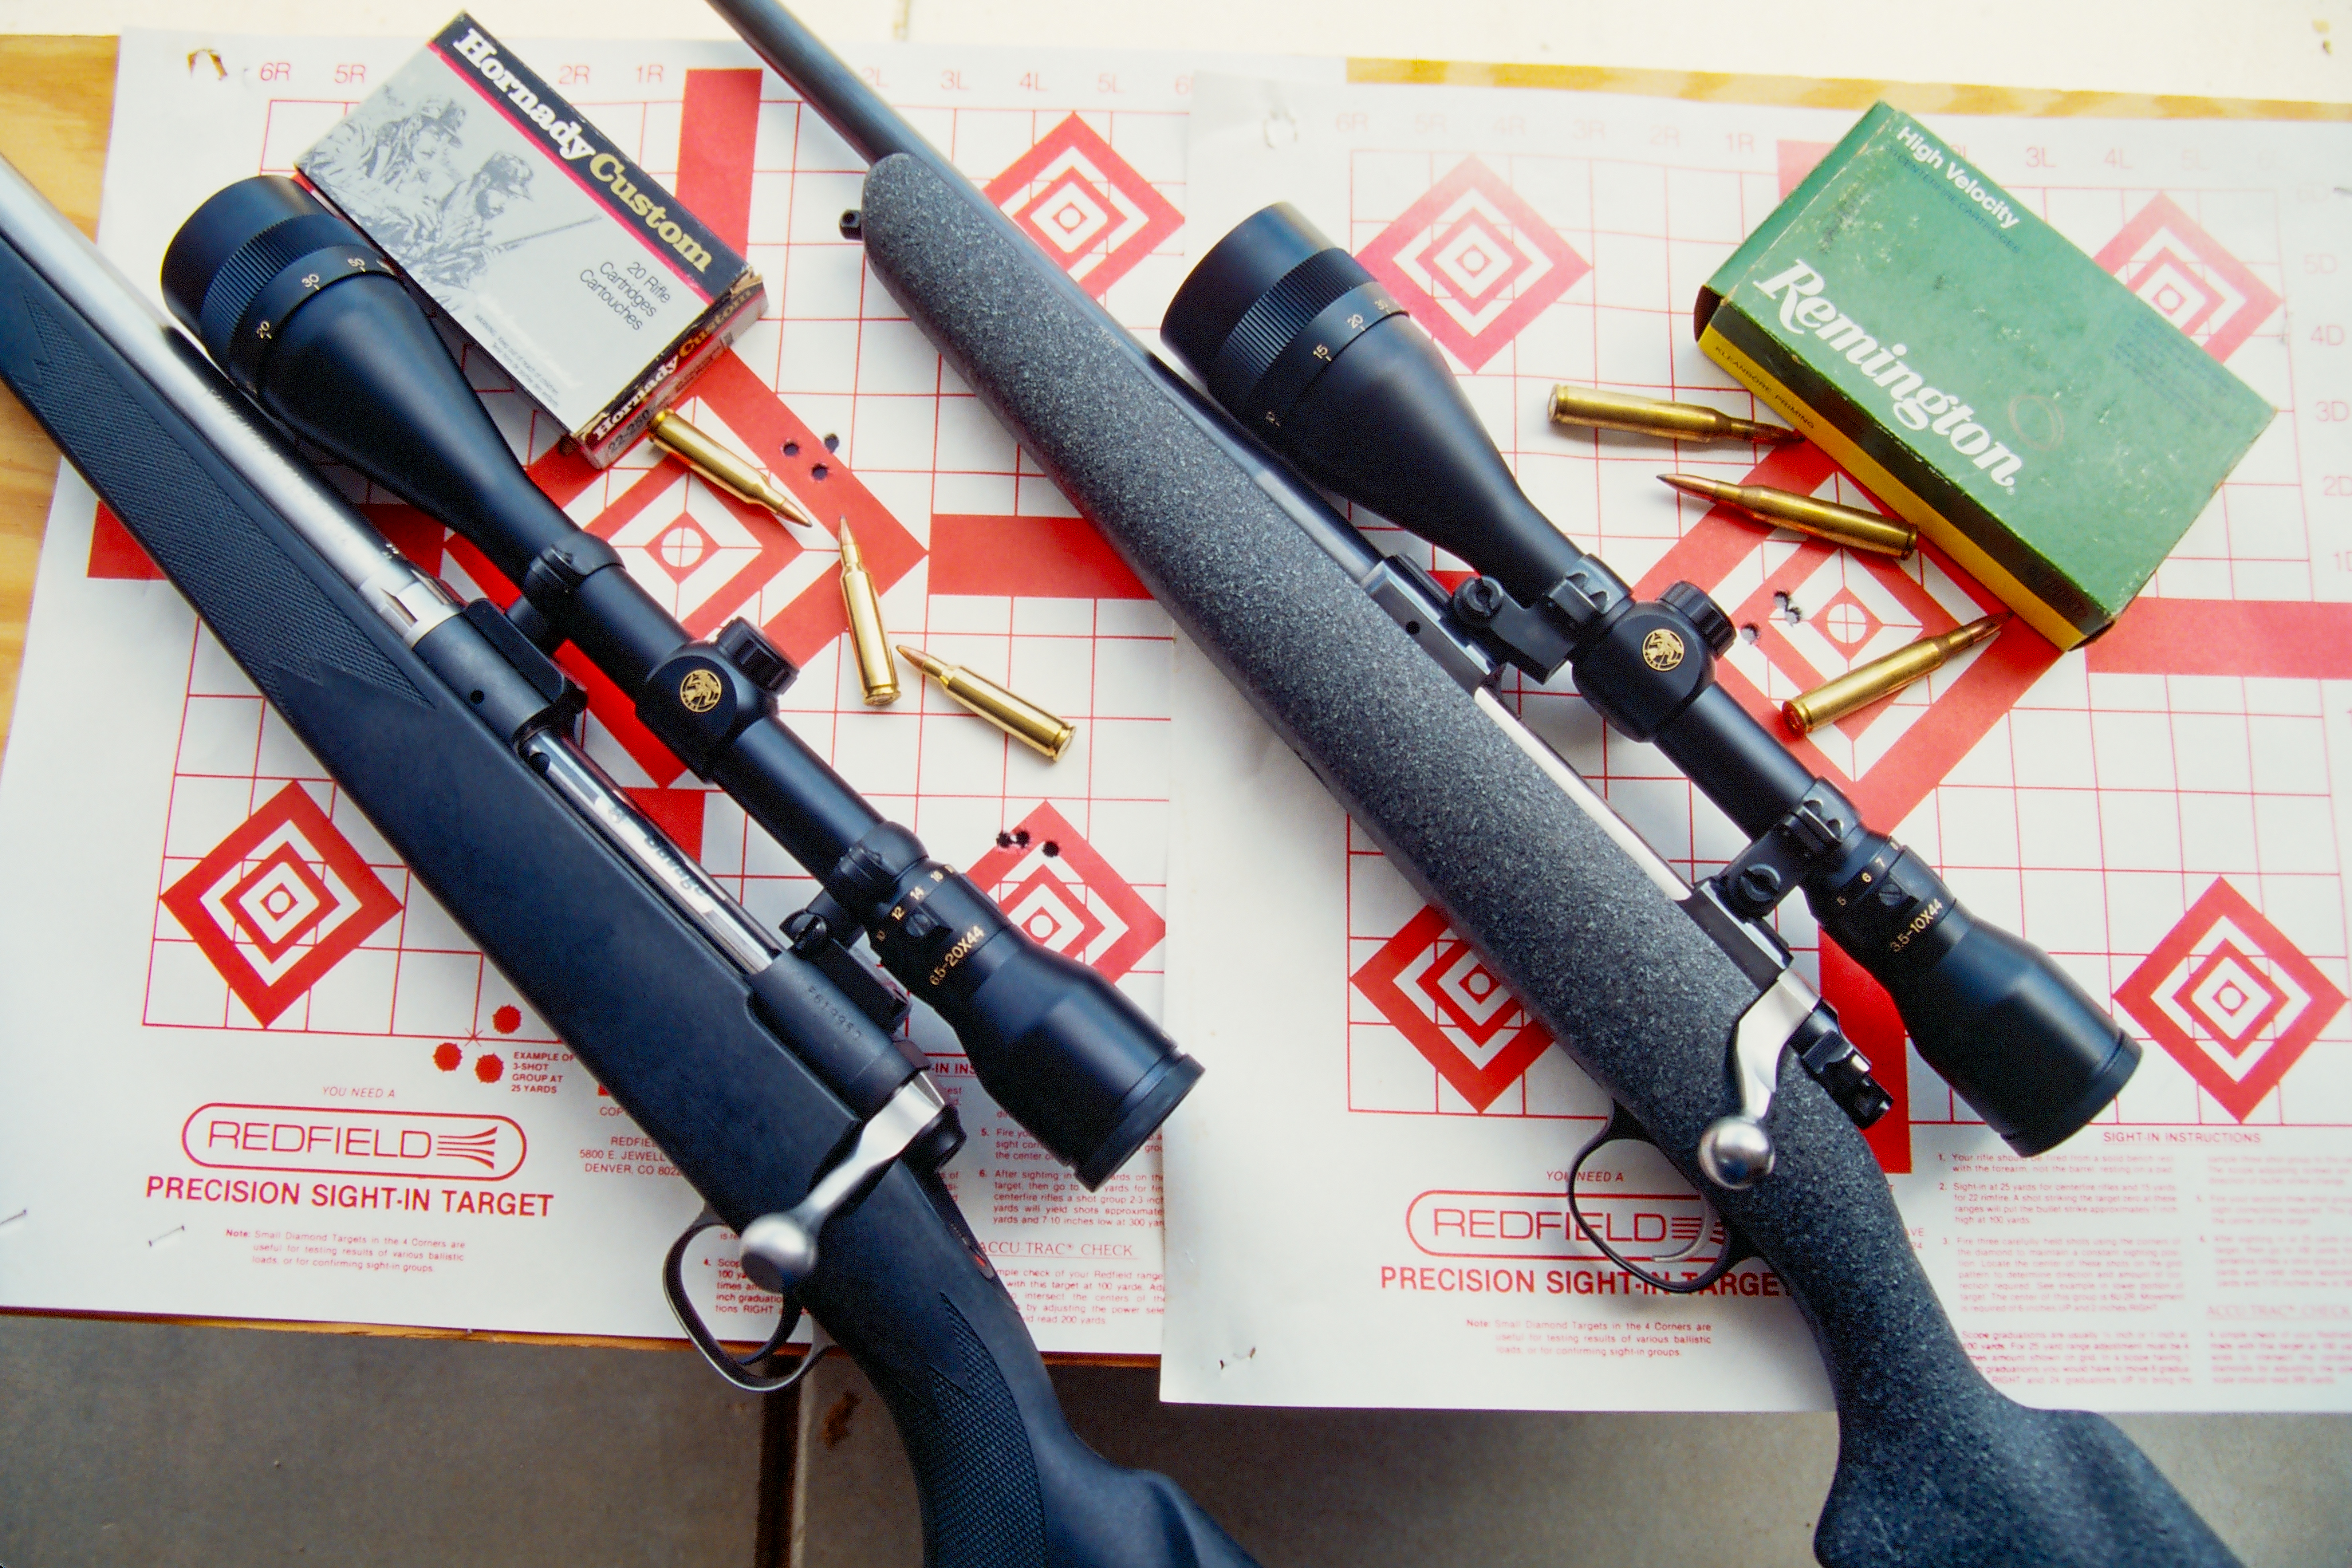
As a youngster, I learned to shoot with open-sighted .22s, rifles and handguns, but I did my first hunting in the ‘60s with fixed 4X scopes. I never hunted with iron sights until 1979. By then, I had my first variable, a 3-9X Redfield. Wow, that huge image made shot placement so easy. Today variable magnification runs deep into double digits, along with scopes that incorporate laser rangefinders and yield shooting solutions. Just yesterday I went to the range and zeroed a Pulsar thermal imaging riflescope.

With such advancements, are iron sights still useful? Despite magnifying scopes, lasers, and reflex sights, open sights still dominate in handgunning, because ranges are short, and because a handgun with an optic is more difficult to carry and holster. In the rifle world, generations have grown up shooting and hunting with scopes.

Boddington and Tim Baugh with a fine Kansas whitetail, taken with a classic 6.5x54 Mannlicher with factory open sights. In order to assure a close shot, Baugh used an archery stand in thick woods. As often happens, enough light to see the sights was an issue, but patience paid off.
Boddington and Tim Baugh with a fine Kansas whitetail, taken with a classic 6.5×54 Mannlicher with factory open sights. In order to assure a close shot, Baugh used an archery stand in thick woods. As often happens, enough light to see the sights was an issue, but patience paid off.

This is sad. Much to be gained by learning to shoot with iron sights. One quickly learns slight aiming errors cause huge differences. Daughters Brittany and Caroline had no interest in shooting or hunting until they were mid-teenage. Then, as if a switch was turned, both suddenly wanted to go hunting with Dad. I made mistakes with both. We began with scoped .22s, but I skipped starting them with iron sights. They shoot well, but they missed the valuable lessons of carefully aligning front and rear sights.

Boddington is about to drop the hammer on a Texas hog, using a Winchester 94 in .30-30 with factory iron sights. Although adequate light is always an issue, feral hogs are ideal game for iron sights: You can usually get close enough, and often get multiple opportunities.

Eastern deer hunters who started with Grand-dad’s .30-30 received this training. So did all veterans…until adoption of the ACOG riflescope. Today, many younger hunters have little or no experience with iron sights. Regrettable they don’t have that background, no way to appreciate how spoiled we are by magnifying riflescopes, or the fun and frustration of iron sights.

There are two types of iron sights: Open and aperture. The open sight is typically a blade or bead front sight, which must be visually centered in the notch of a rear sight, usually a V or U. The aperture or “peep” sight uses a similar front sight, with an open circle rear sight, in which the front sight must be centered, then superimposed on the target.

On both open and aperture sights the front sight is normally a blade (left), or a bead. Boddington prefers a bold bead of about 3/32-inch diameter. A large bead obscures more of the target but is easier to see and faster to acquire.

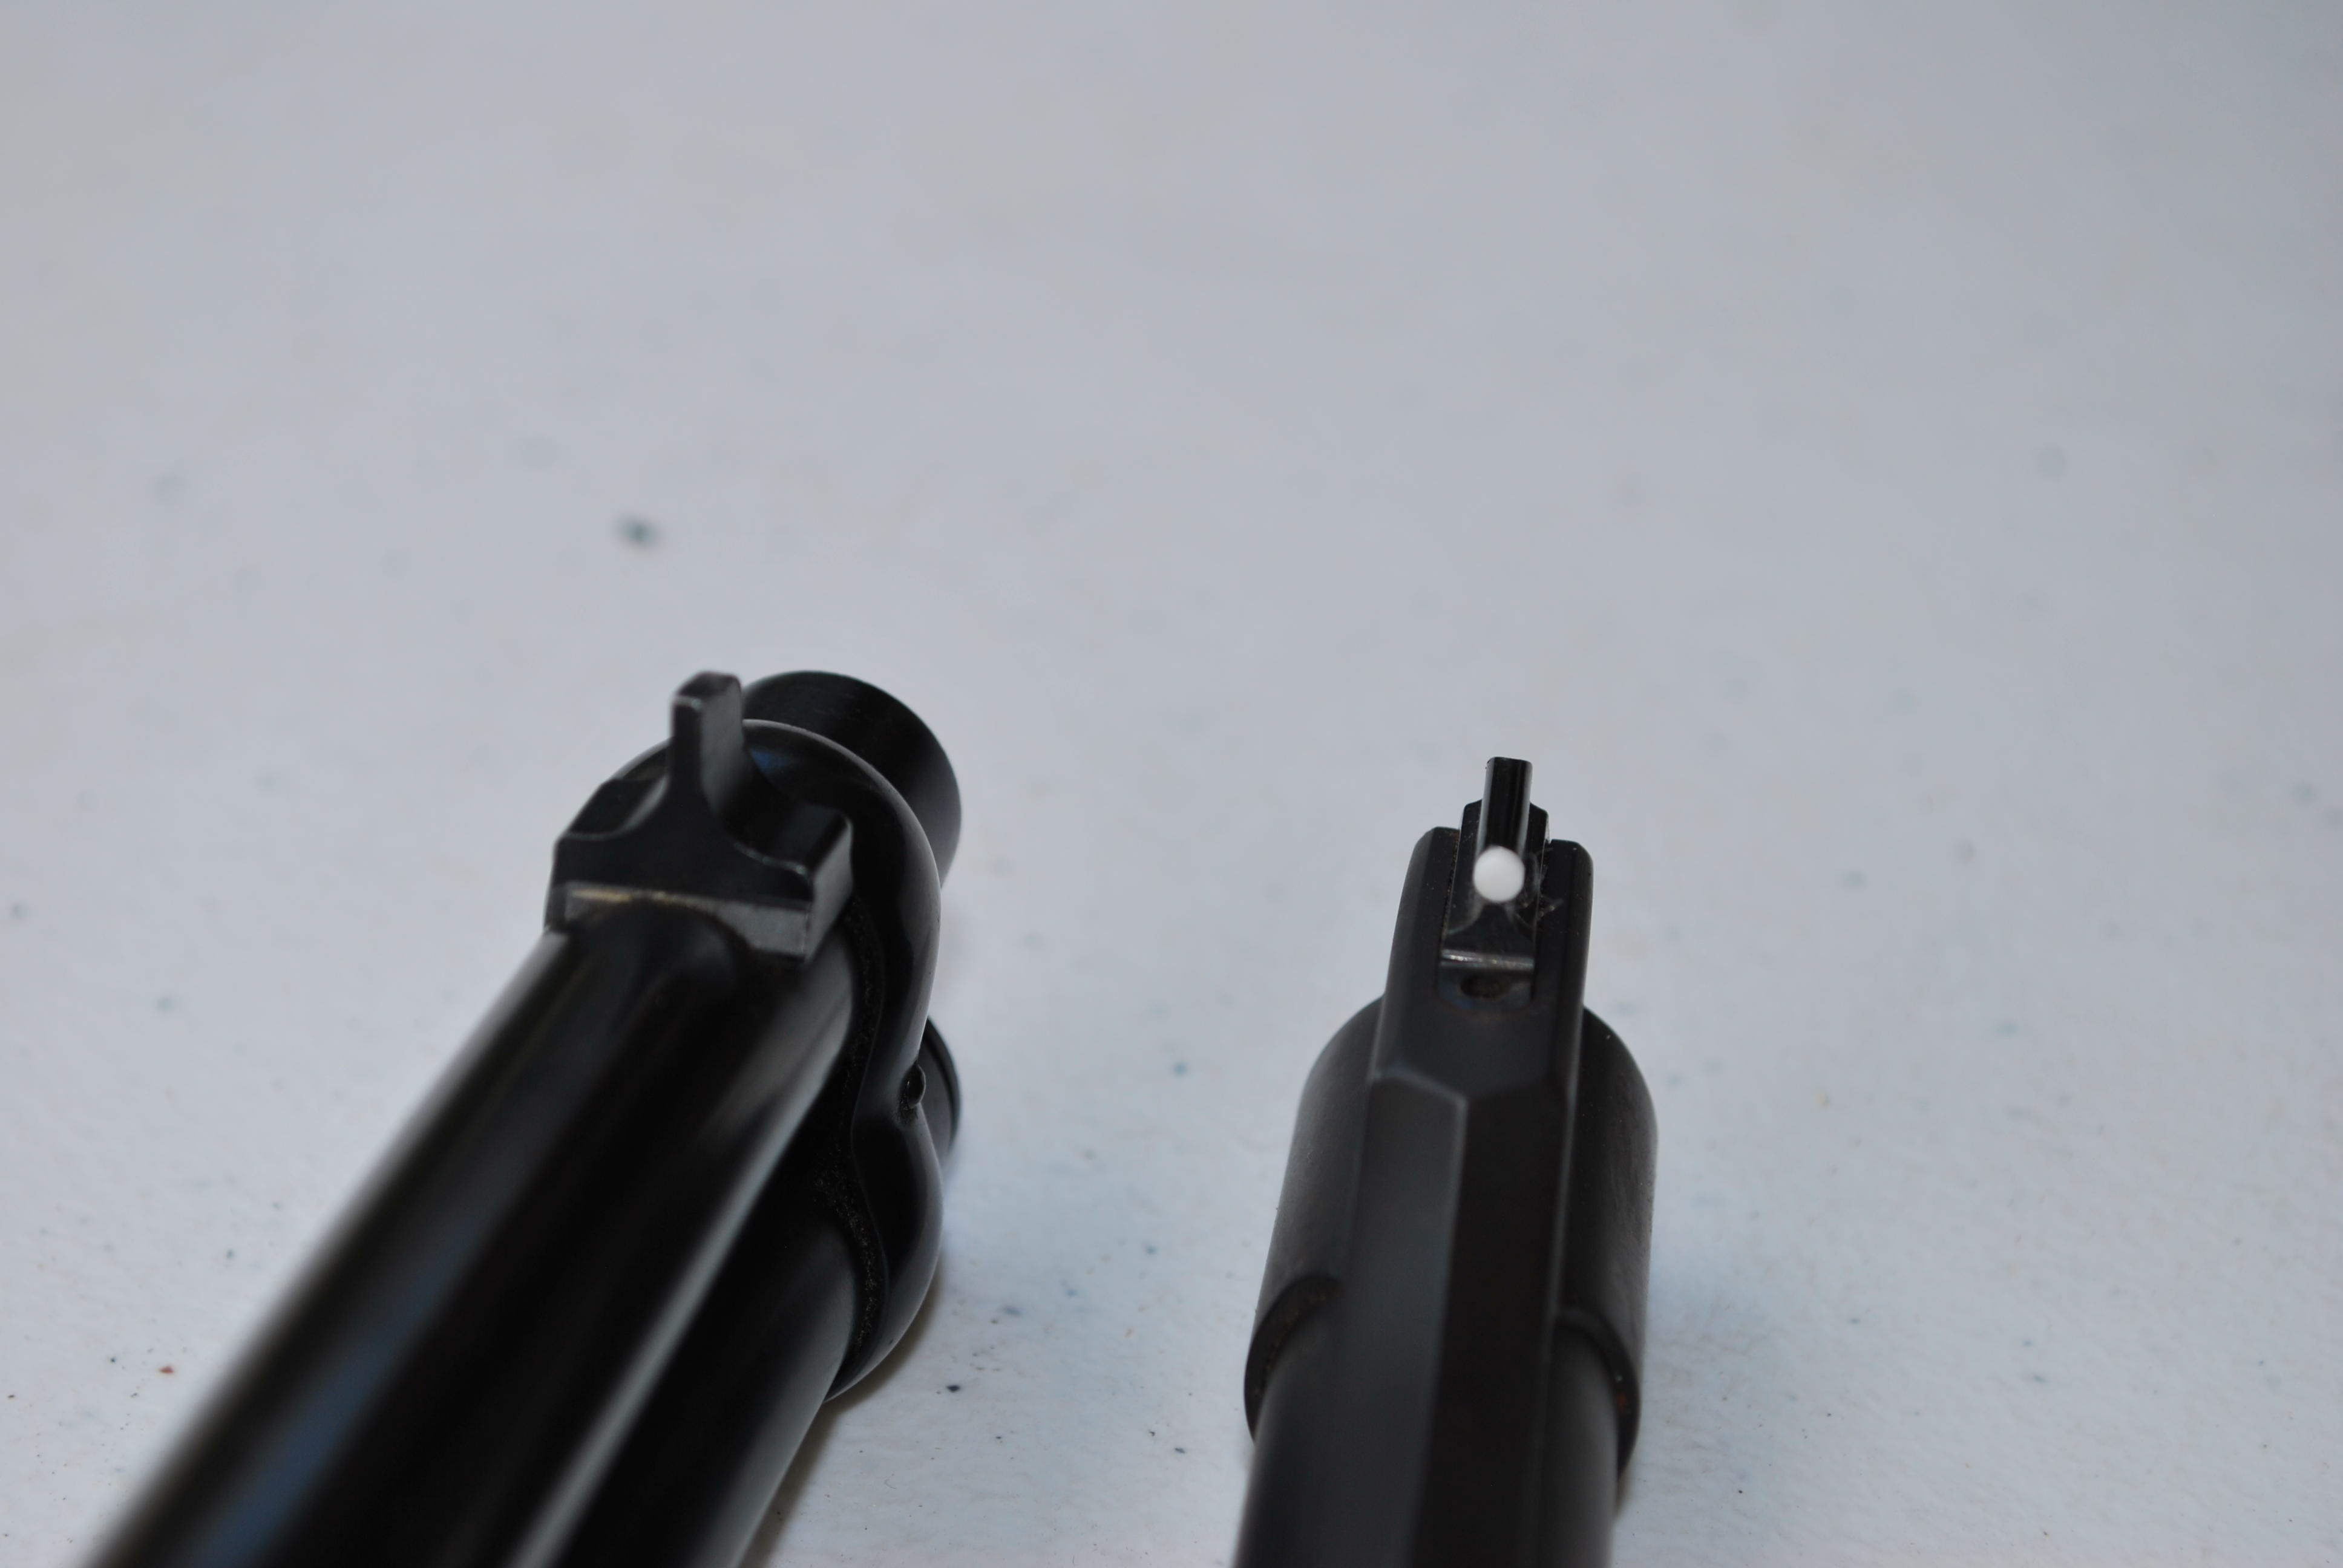
Open sights require the eye to focus in three focal planes: Rear sight, front sight, target. The aperture sight reduces this to two: The eye naturally centers the front sight in the circle. The rear sight “fuzzes out,” but the eye must focus on front sight and target. The riflescope reduces this to just one focal plane: All the eye must do is focus on the target and superimpose the reticle. Same with the reflex or “red dot” sight, which has only existed since the Aimpoint came out in 1975.

With good vision and adequate light, peep sights are capable of superb accuracy. Up until a decade ago, Boddington could regularly produce groups like this with apertures. This is a 1930s RF Sedgely Springfield, fitted with receiver-mounted aperture.

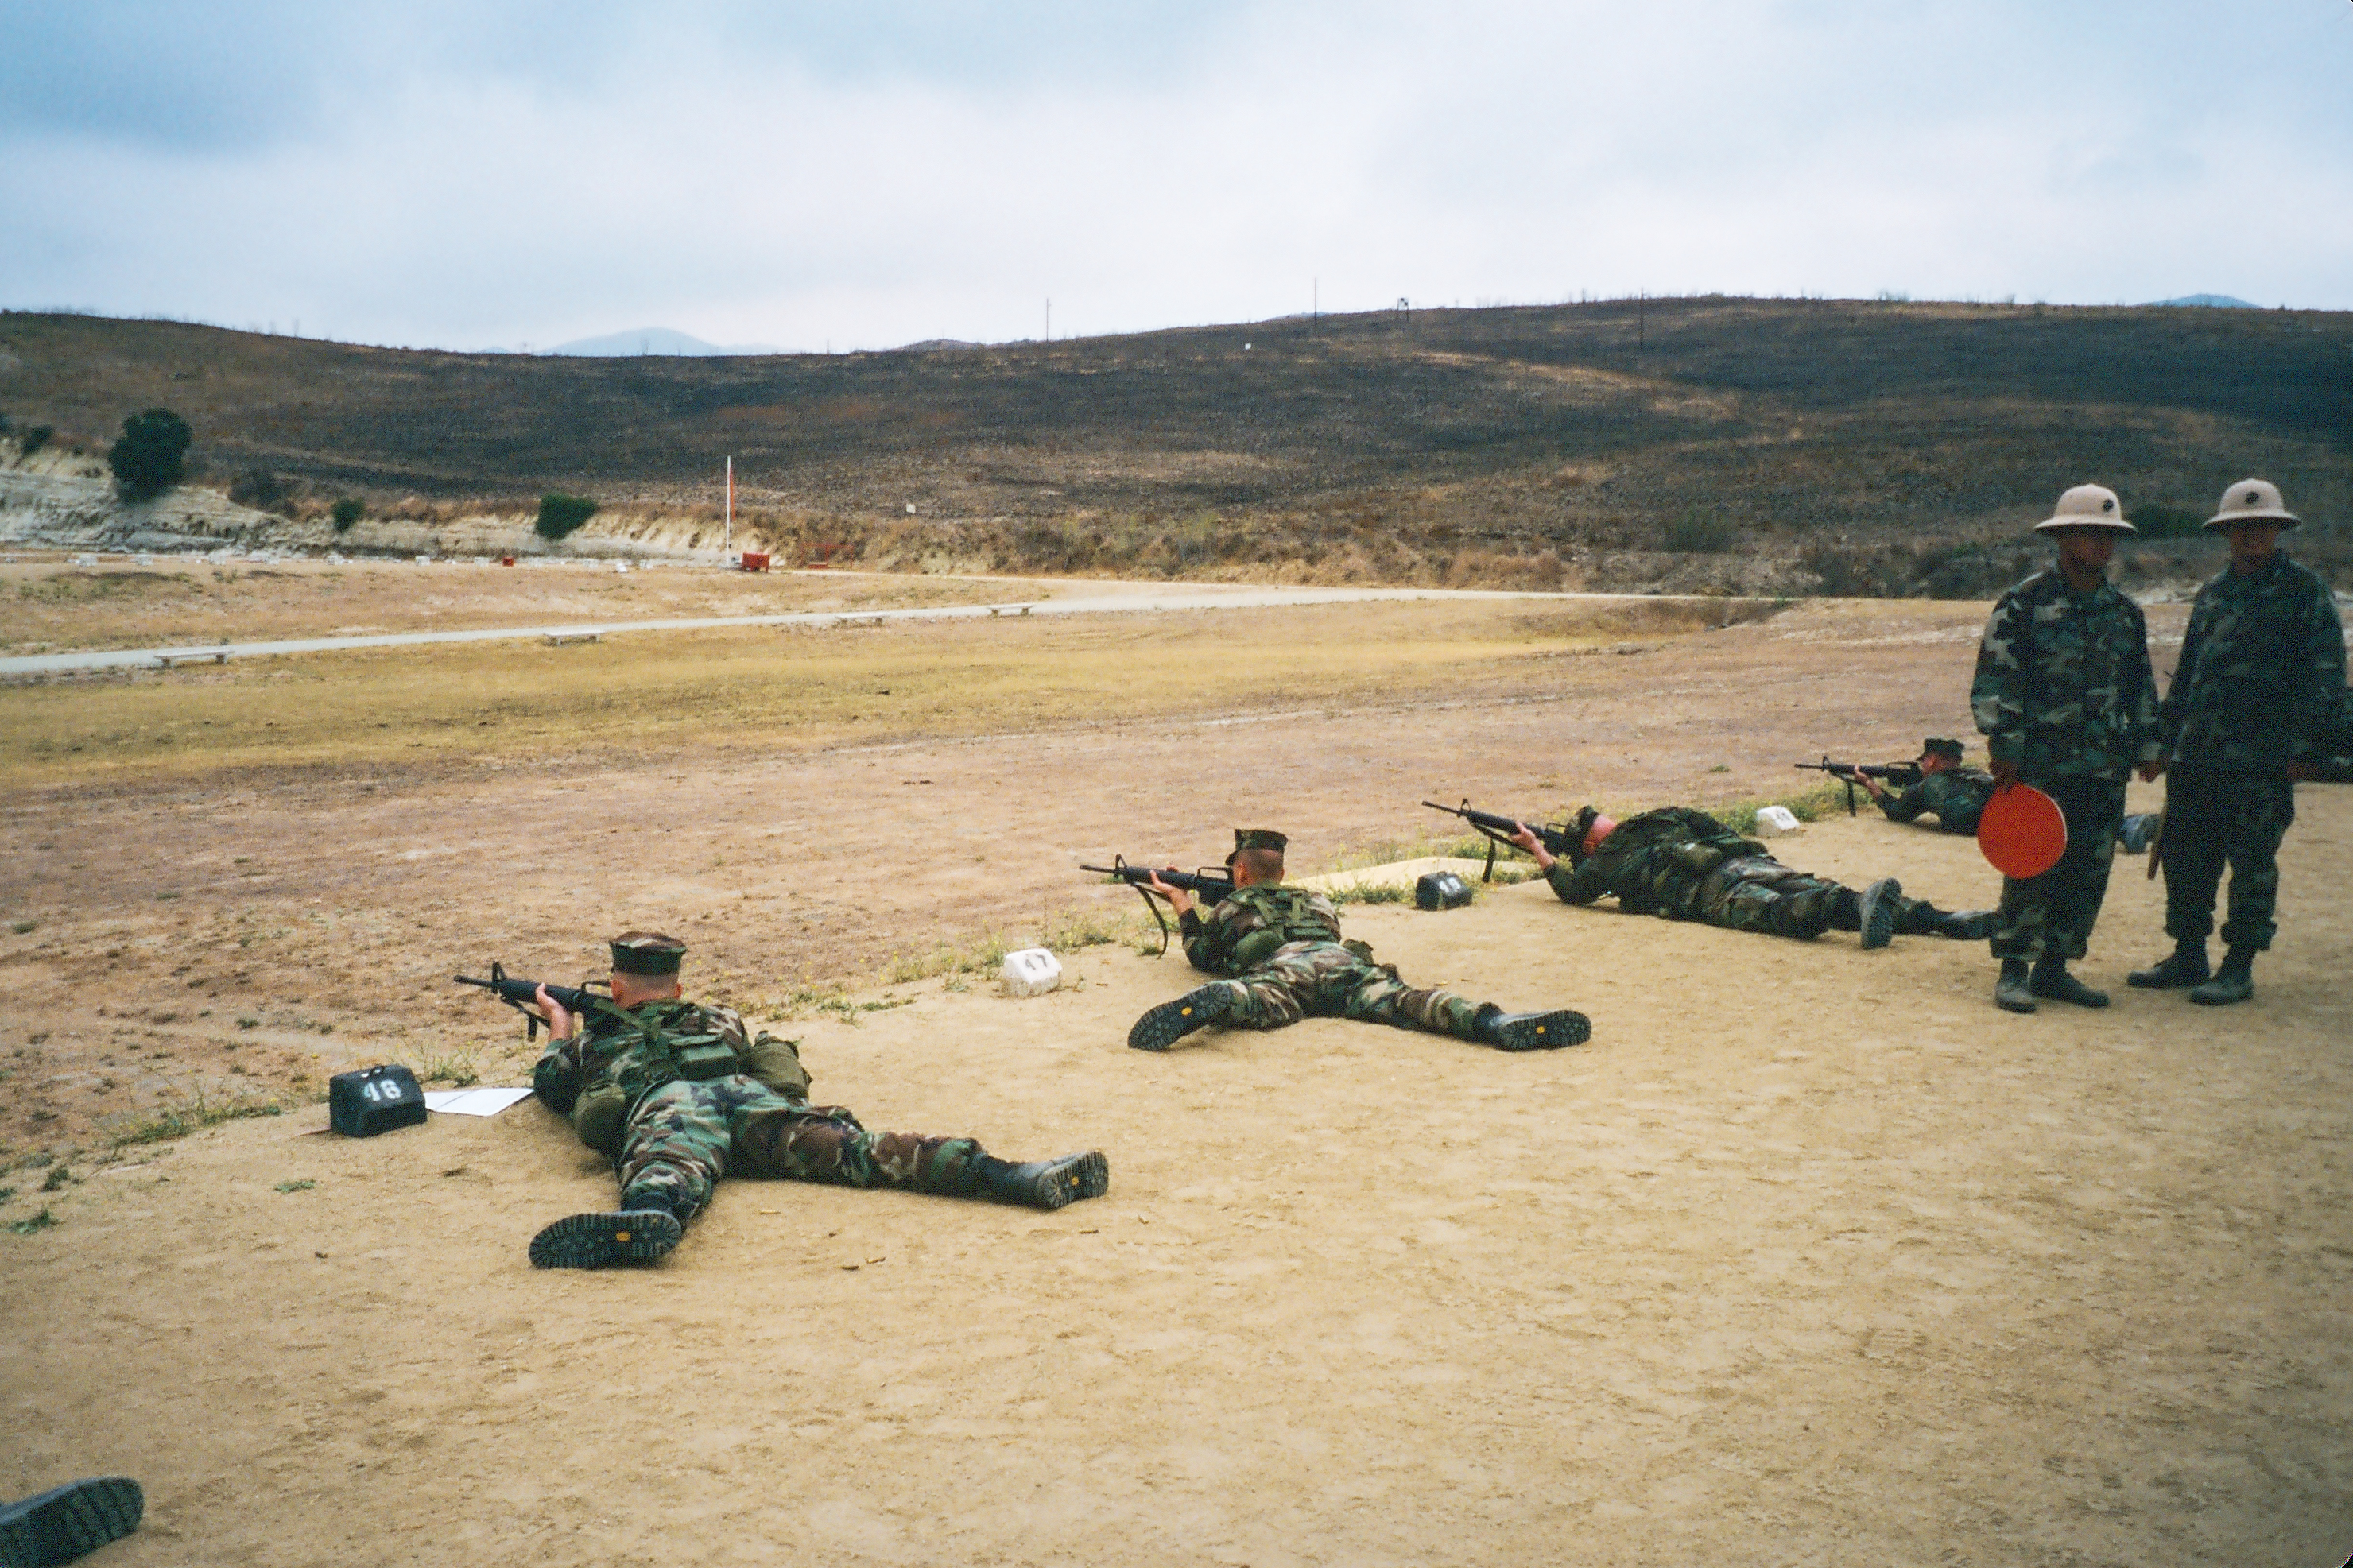
Capability with iron sights depends largely on size of target and visual acuity (which tends to diminish with age). When I was young, I could resolve open sights beyond 200 yards. Today, less than half. Before scopes, the aperture sight was the “precision” sight. In the Marines, we qualified annually to 500 yards with peep sights, and much 1000-yard competition is still done with apertures.

Qualification day at Edson Range, Camp Pendleton. Until the recent adoption of Trijicon’s ACOG scope all Marines shot out to 500 yards with aperture sights.

With all open sights, as distance increases, the front sight subtends (obscures) more of the target. Absent magnification, same with red dots. A greater limitation to open sights: They require good light. With age, night vision tends to diminish along with overall acuity.

So, sights with lenses that admit more light are always superior in those critical periods at dawn and dusk, aided further by lighted reticles or the illuminated red dot. The only real disadvantage to both scopes and red dots: They are an additional appendage, adding weight and bulk. We have this idea that iron sights are more rugged and goof-proof than optical sights. This can be true, but usually isn’t. Today, factory-supplied iron sights are often flimsy, seemingly supplied primarily for “looks,” little thought they might actually be used. I’ve seen many more iron sights bend, break, and come out of zero than I’ve had trouble with scopes.

This herd is just over 100 yards away, no more cover and no more options. If a bull steps out it’s a simple shot with a magnifying scope, do-able with a red dot…but much too far for a safe shot with iron sights.

Still, scopes and red dot sights remain non-traditional with various types of hunting rifles. To the point that we, including me, stubbornly insist on using iron sights. Good examples are double rifles and traditional lever-actions. I like both types so, in recent years, I’ve been doing more hunting with iron sights than I did when I was young.

This sporterized 1903 Springfield .30-06 was Boddington’s first centerfire rifle, mounted with a Williams aperture on the rear receiver ring. As a youngster, he never hunted with this rifle; he was nearly 40 when he used it for this California feral hog.

There’s a caution here: Iron sights are difficult. At middle-age, kids gone, mortgage paid, we may wake up one morning with the means to acquire a classic double or fine old Winchester. The expertise to effectively use iron sights doesn’t come with the purchase. Steep learning curve, especially if you didn’t grow up shooting irons.

Boddington on the range with his Heym .450/.400-3” double, mounted with an Aimpoint red dot sight. Boddington agrees that optics look terrible on classic doubles. However, as his vision restricts iron sight use, optics enhance accuracy, range, and versatility.

We have this romantic idea that big-bore double rifles should wear “express” open sights. And older top-eject lever-actions defy conventional scope mounting. Fine. Make a commitment to lots of practice, understand you must keep your ranges short, and accept that you’re going to give up potential shots. Especially at dawn and dusk.

To some extent, it depends on what’s more important to you: The hunt or the game. Or, if you’re a “gun guy,” the opportunity to use a certain rifle. Couple seasons back, at our Kansas farm, Tim Baugh wanted to use his late father’s open-sighted 6.5×54 Mannlicher,. Light comes late in our thick woods and leaves early. I put him in a stand set up for archery.  He saw deer early and late, couldn’t see his sights, stayed patient, shot a fine buck on his fourth morning.

Although open express sights are most common on double rifles there are other options. This .303 double has a flip-up aperture on the tang, greatly increasing accuracy and versatility. These are descending pairs from both barrels after sight adjustments.

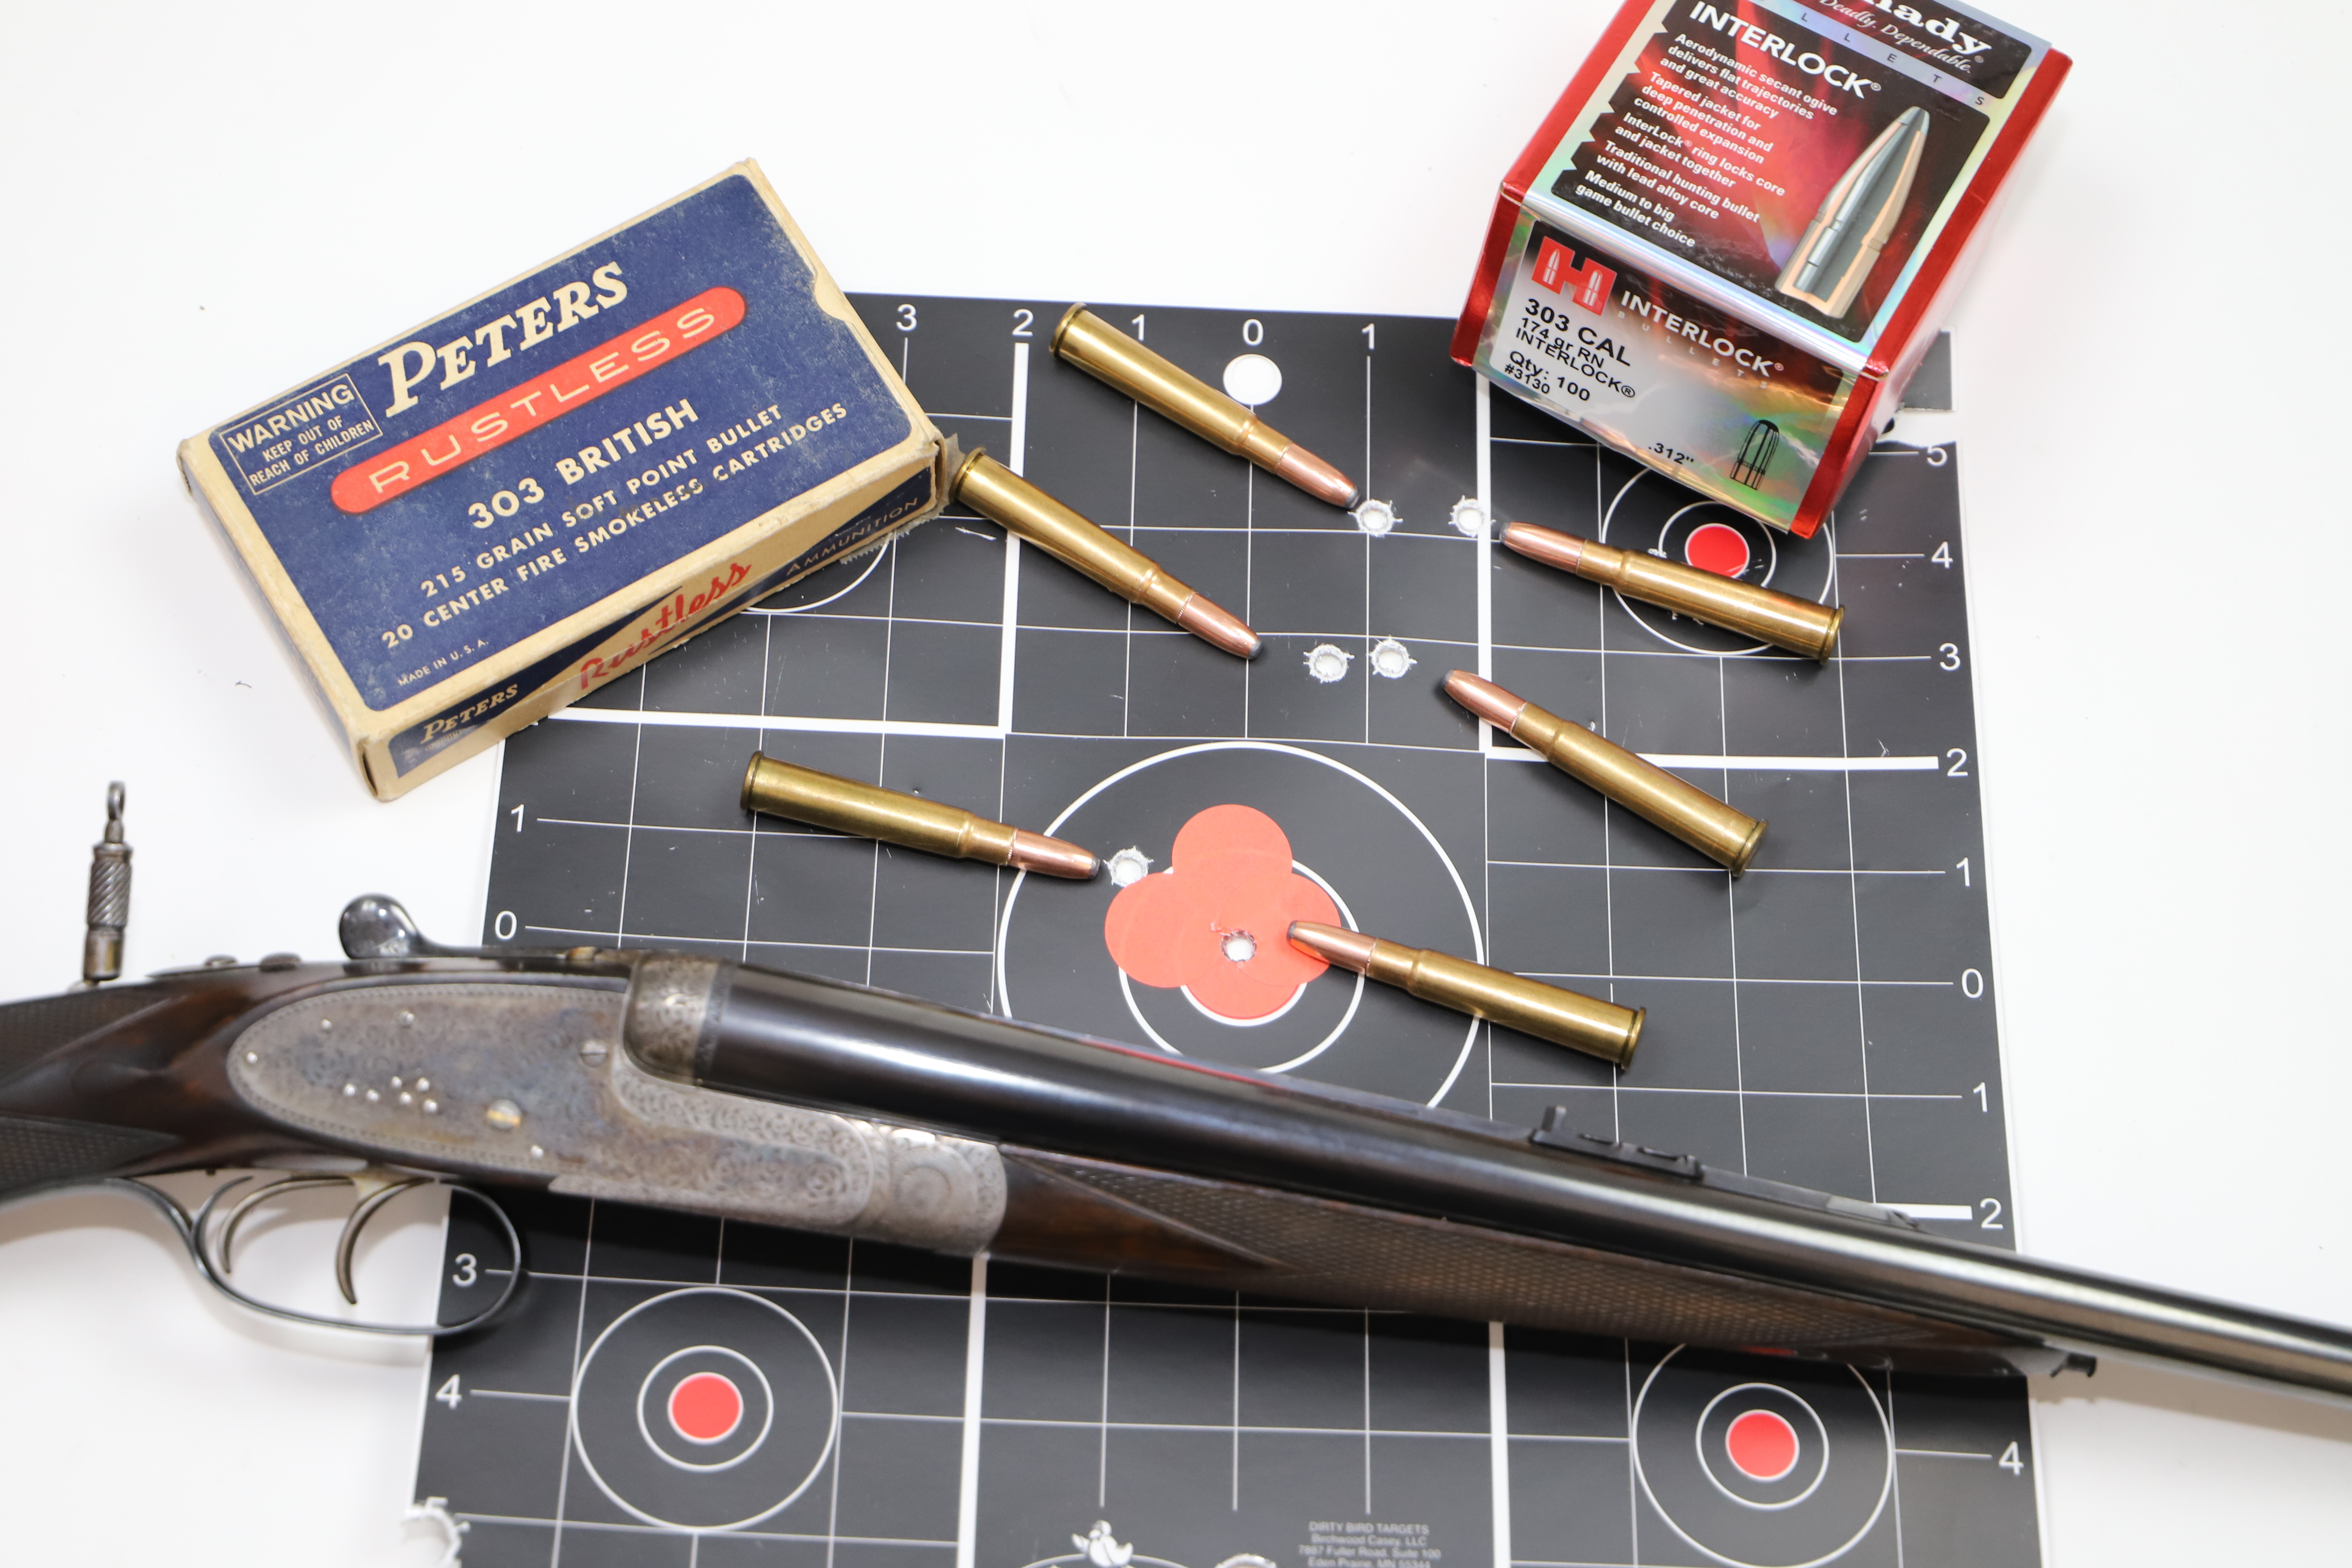
Unless very close, I much prefer apertures to open sights. I’ve used receiver-mounted peep sights on lever-actions for decades, and I have a double rifle in .303 British with flip-up peep on the tang. With adequate light, I’m still good to beyond 100 yards.

Until the 1940s the aperture was the precision hunting sight. Boddington used a 1930s .30-06 Springfield by RF Sedgely to take this Colorado bull, one shot at about 125 yards.

The good news: If you have 100 yards of effective range, you’re in good shape for much hunting. Just understand you can’t always get that close. I’m not going sheep hunting with iron sights. Although, before 1940, everyone did. I’m reluctant to use iron sights for whitetails. Not a matter of distance, but light.

This Alberta black bear was taken with a Big Horn Armory M89 in .500 S&W. The “guide gun” is popular today, often mounted with a “ghost ring” aperture like the Skinner sight on this rifle. Getting close enough to take black bears with iron sights is often possible, but light can be an issue.

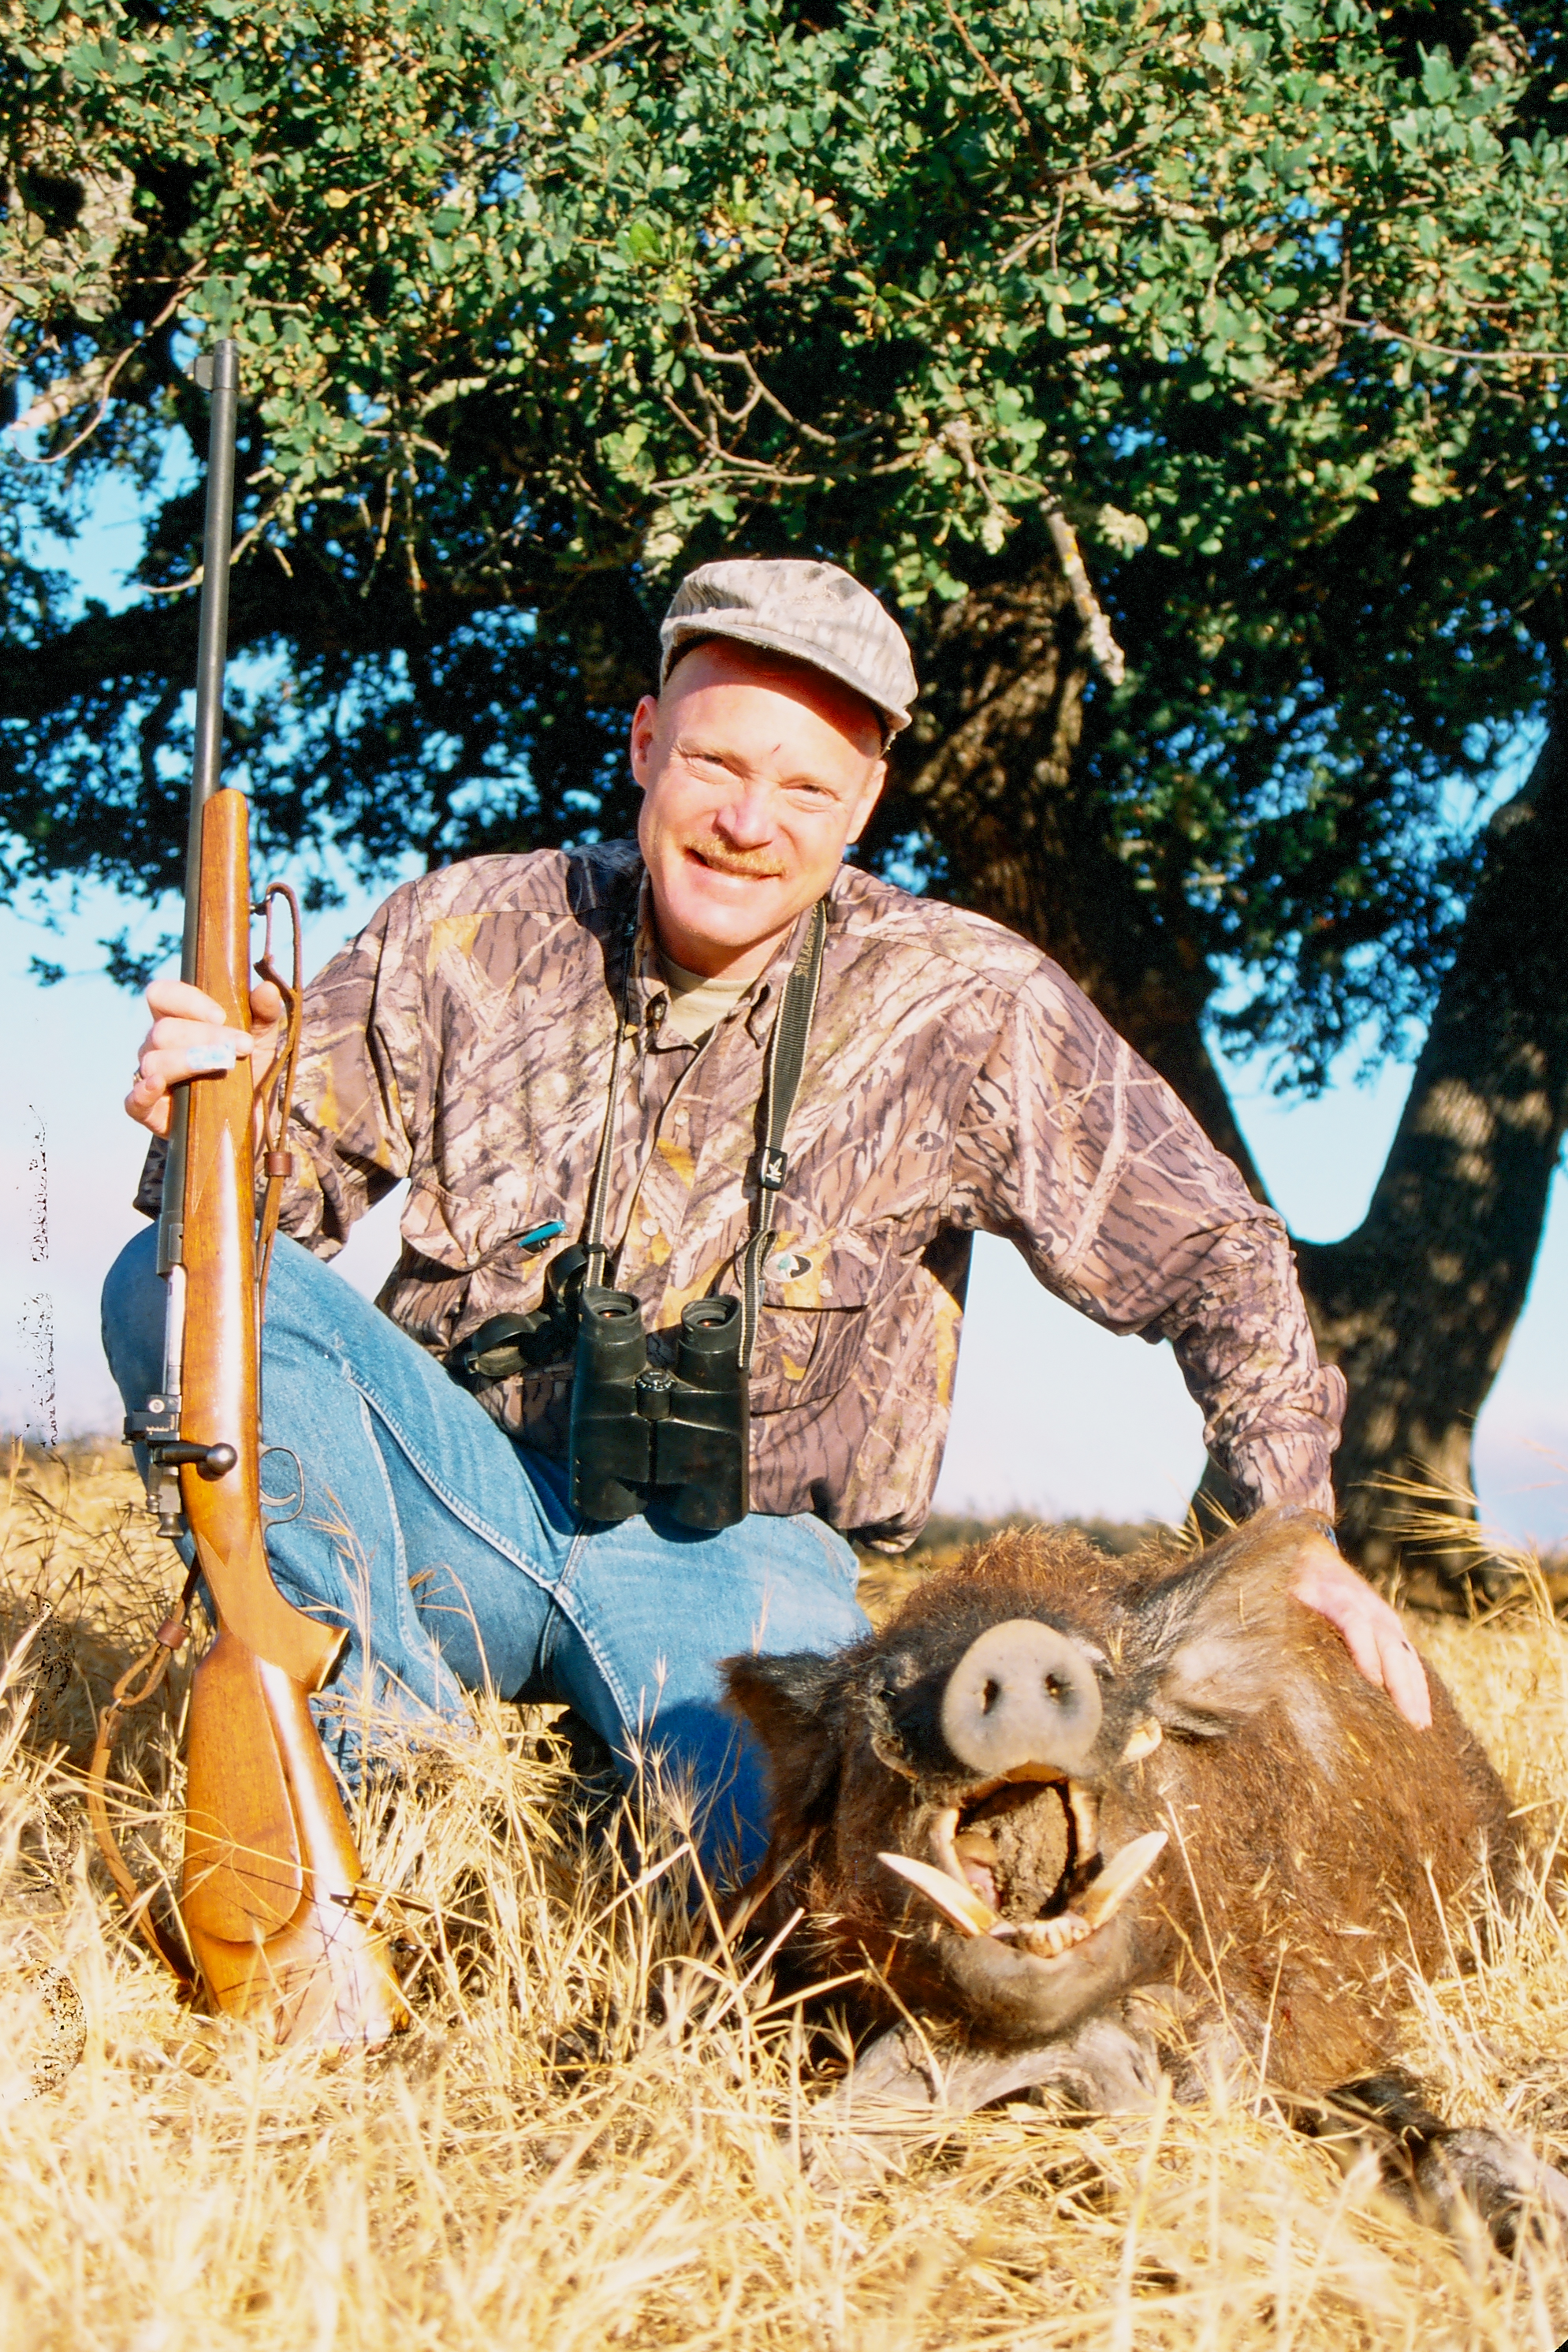
I often use iron sights for feral hogs and black bears. With hogs, I can usually get close enough. If I can’t, another opportunity is likely. On black bears, light is the issue. Couple years ago, I took a peep-sighted .348 Winchester into an Idaho bear blind. Also, a scoped rifle. Had a bear on the bait, too dark to see the front sight. I switched rifles and shot the bear. If you’re really a gun guy, that was serious cheating.

Big-bores doubles traditionally wear fixed open sights. Strong and sturdy, short in range. Perfect for PHs, who only fire in emergencies. For you and me, questionable for buffalo because, with herd animals, tough to get close enough. Can be done, and I have…always with the understanding that I must pass on many potential shots. Optical sights look awful on a classic double, but they are practical. In recent years, as iron sights grew harder to resolve, I’ve choked it up and put red dots and scopes doubles.

Recently, we’ve seen a resurgence in aperture sights. Thanks somewhat to the popularity of the big-bore lever-action “guide gun,” commonly mounted with a large-opening rear aperture that we call a “ghost ring.” Not as precise as a target aperture with tiny opening, but faster, adequate for shooting game to at least 100 yards. This type of lever-action is popular with wilderness wanderers in bear country, also carried by some Alaskan guides. Good choice for both.

This is the kind of encounter buffalo hunters hope for. If you can get this close, iron sights are wonderful. Problem is, with herd animals like buffalo, getting within sure iron sight range isn’t always possible.

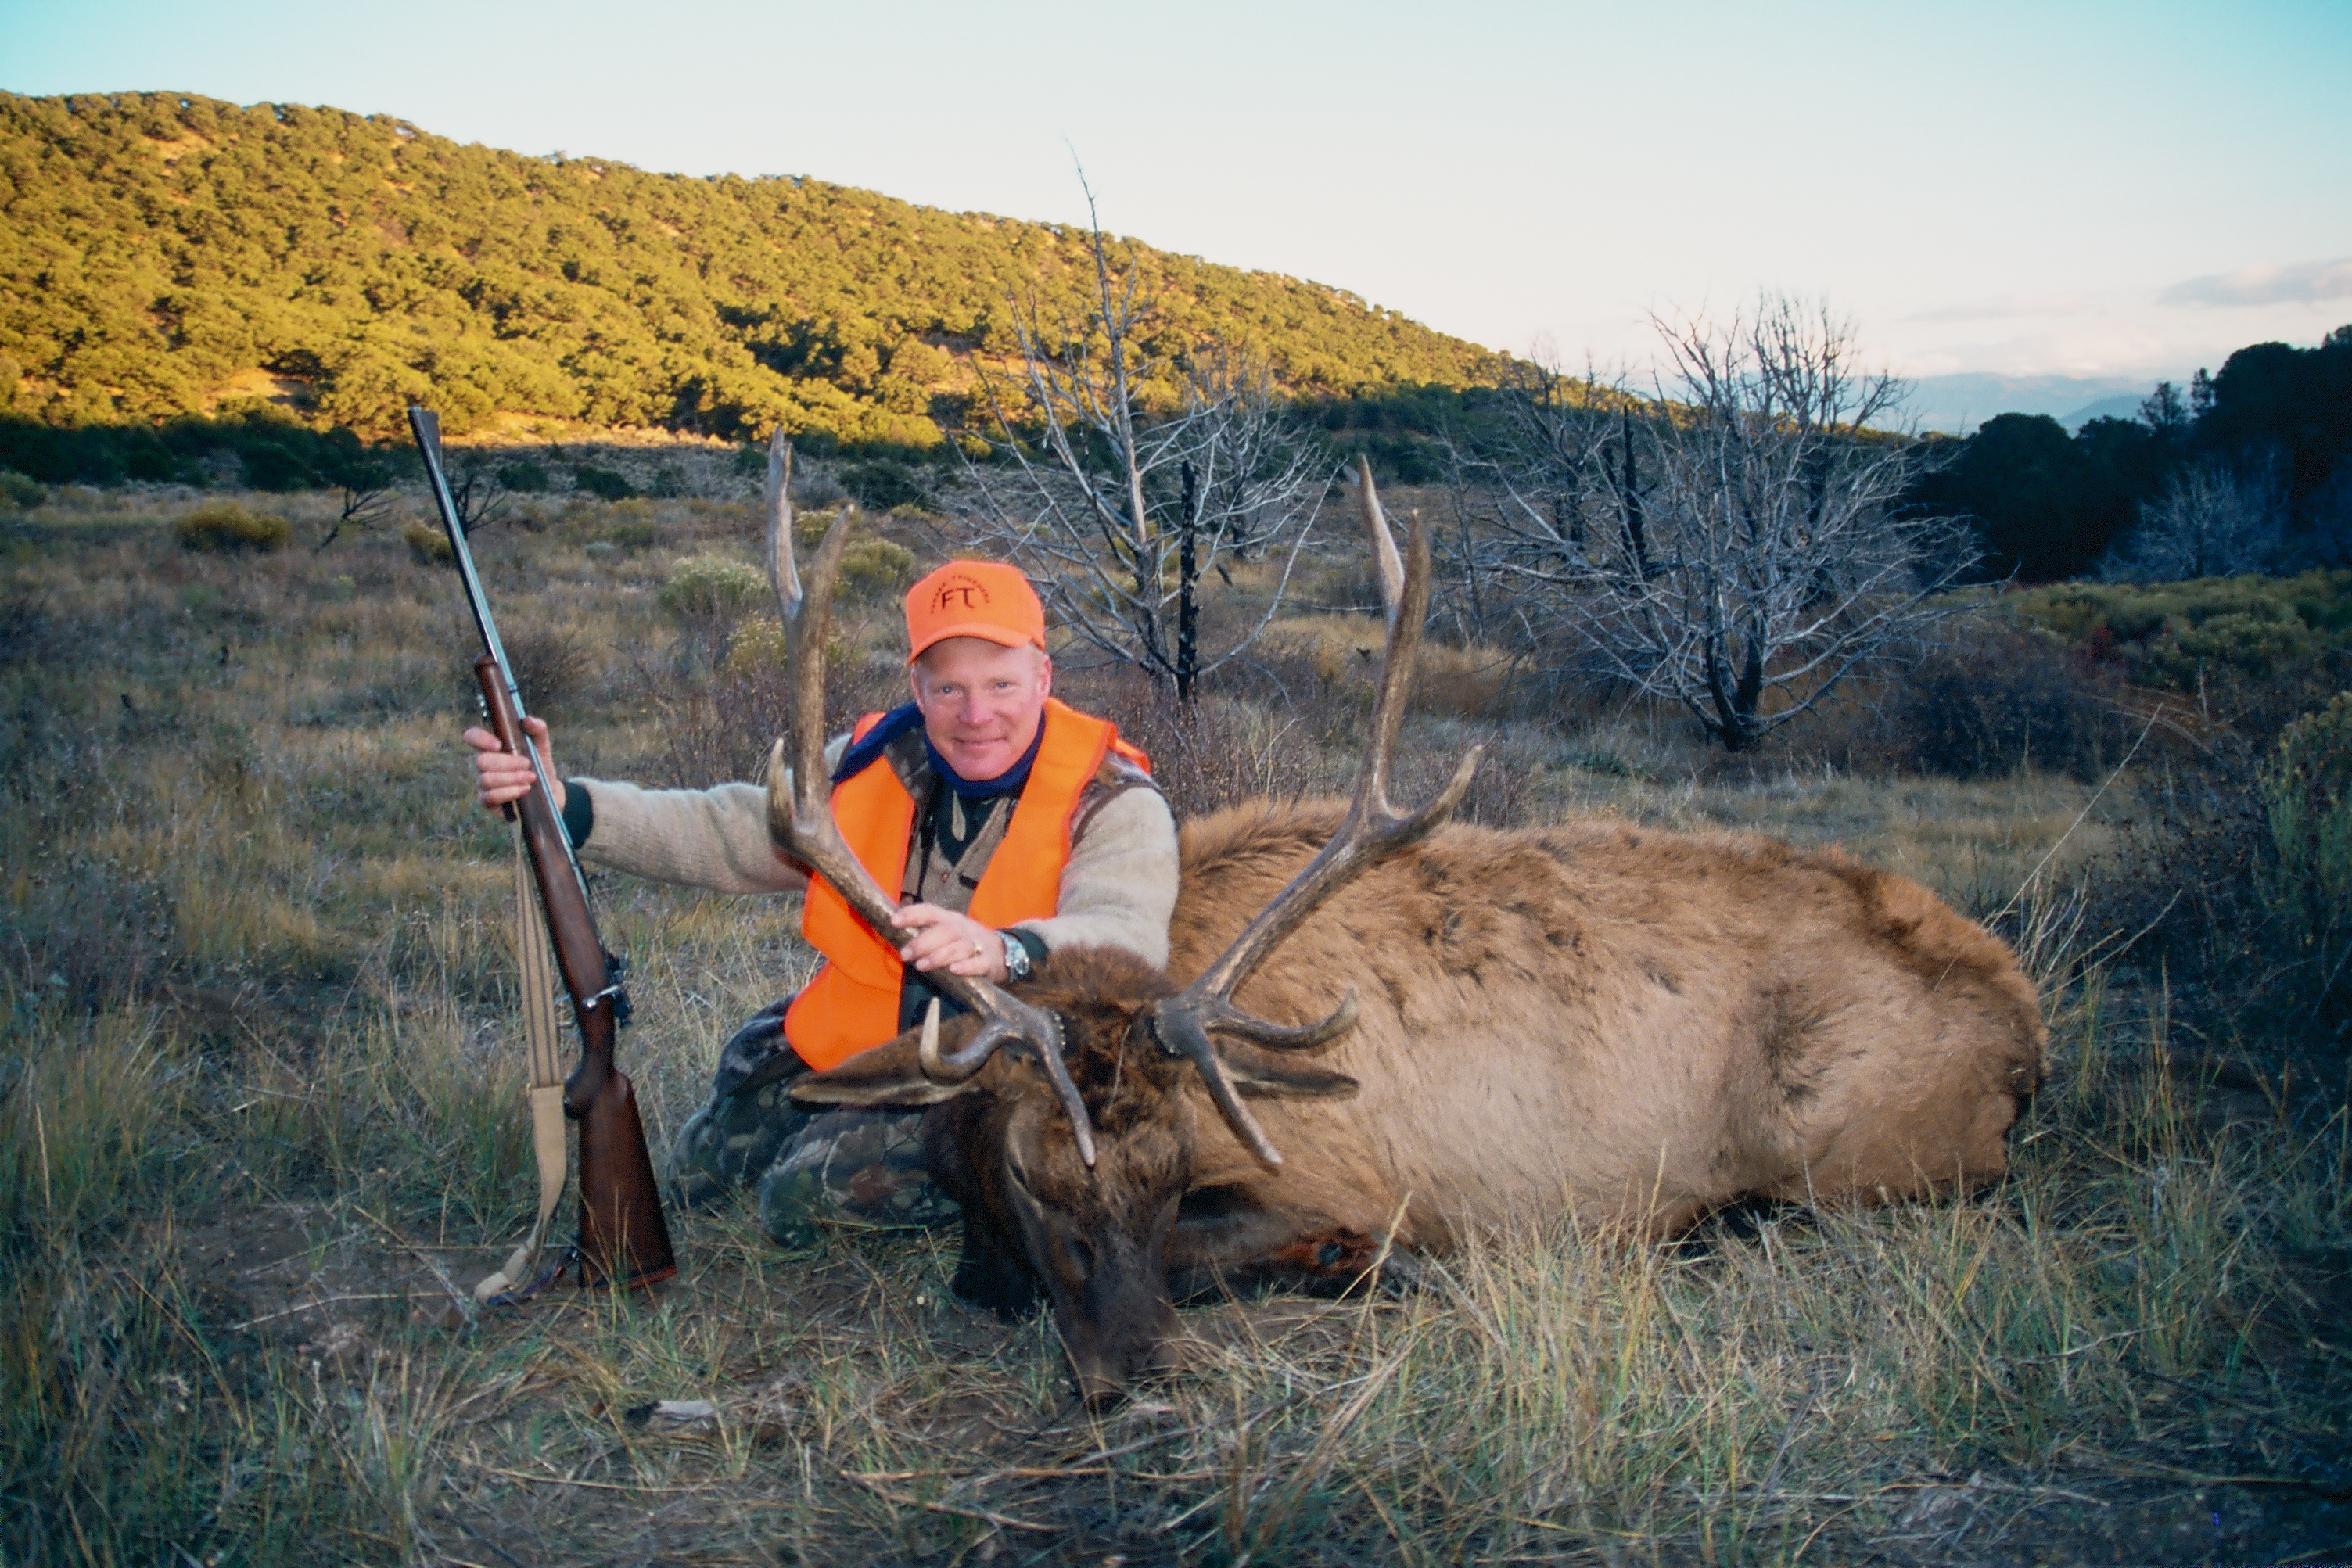
As with Cape buffalo, not ideal for you and me to carry on a hunt for grizzly or Alaskan brown bear. Such hunts often come down to just one chance. This past year I considered taking a big lever-action on an Alaskan hunt, talked myself out of it and went with a scoped .338. My chance came at 225 yards, foolish shot with any iron sight, regardless of expertise.     

Although scopes and red dots are commonly used, iron sights still dominate in handgunning to keep the profile trimmer. This is a favorite hunting handgun, a SIW M29, always used with iron sights. Just need to keep shots close.

There are many close-range hunting situations where iron sights remain suitable. If you can get close enough and have enough light. In the entire spectrum of world-wide big-game hunting, I can only come up with three situations where iron sights are superior. First is during wind-driven precipitation, too hard and fast to keep a lens clear.

Boddington and Idaho houndsman Bruce Duncan with a good mountain lion. Duncan’s M94 .30-30 is a classic houndsman’s rifle: Short, light, easy to scramble with in tough country…and no scope.

Another is hunting with hounds. Houndsmen are justifiably concerned for their dogs’ safety. They worry about the “tunnel vision” effect of magnifying scopes; some houndsmen do not allow use of scopes. The range is short enough, and a sleek, un-scoped rifle (or handgun) is a blessing in the mad scramble to get to the hounds.

Elephants are almost always encountered—and taken—at extremely close range. Magnifying scopes aren’t needed, and Boddington believes they are dangerous in this application because of the potential “tunnel vision” effect.

A third is hunting elephant. 25 yards is a long shot. Magnification isn’t needed, and the tunnel vision effect is dangerous. Not just the risk of seeing a wall of gray hide. The greater is other, unseen elephants. You need peripheral vision. With hounds and hunting elephant, a red dot sight is a sound alternative, but in these specialized situations, iron sights are superior.

CHOOSING VARMINT CARTRIDGES

By Craig Boddington

Although there are many other good choices, these are Boddington’s favorite varmint cartridges, left to right: .17 HMR, .22 Hornet, .204 Ruger, .223 Rem, .22-250. On a given day, which is used depends on game, distance, and wind.

When selecting a hunting cartridge, three considerations are most important: Accuracy, shooting ranges, and power, all adequate for the game to be hunted. These apply for hunting any game from prairie dogs to pachyderms.

For varmints, power might seem a silly consideration, so let’s consider that first. The word “varmint” is uniquely American, a corruption from the English “vermin.” The implication is noxious pests, generally removed with minimal restrictions (such as seasons, bag limits, and license requirements). The game Americans generally consider “varmints” range from grass-eating and hole-digging rodents up to coyotes. The distinction can change. In British East Africa (now Kenya and Tanzania), lions were classed as vermin until late in the game. In Europe, the marmot (relative to our woodchuck) is highly prized, often hunted with seasons and limits. In North America, “furbearers” often have separate seasons, sometimes a separate license.

Coyotes are extremely tough animals, but almost all centerfire cartridges are more than adequate. This coyote was taken with a 6.5 PRC, plenty of gun but from .223 Remington upward pelt damage is inevitable.

Because of numbers and voracious predation, rules for coyotes are usually liberal. It’s old Wile E. Coyote that calls up the power question on varmint cartridges. From small gophers to the largest woodchuck, any of the rimfires on up are powerful enough, just a matter of how close you must get.

Coyotes are different, pound for pound for pound very tough animals. Power doesn’t matter so much if the encounter is close. However, unless one is calling, coyote encounters aren’t often close. For me, coyote hunting is a centerfire game. Which one depends on required range, and whether pelt damage is a concern. Serious callers (which I am not) often use shotguns with heavy charges of coarse shot. Easier to hit moving coyotes coming to the call, and minimal pelt damage past 25 yards.

For a May 2024 prairie dog shoot in Wyoming Gordon Marsh hauled the guns. These include .17 HMR, .22 Hornet, .204 Ruger, .223 Rem, and .22-250, a fine selection for all ranges and conditions.

The .17 Remington was developed in Australia, no coyotes but problems with non-native foxes. Light, frangible .17-caliber bullets tend to enter and come apart without exiting, so wonderfully effective without ruining the pelt. The popular .17 HMR rimfire is an awesome medium-range varmint cartridge, but marginally powerful for coyotes unless the shot is close. Today we have centerfire .17s from .17 Hornet up through grand-dad .17 Rem. Plus the rimfire .17 Winchester Super Magnum and the .22 WMR. All are adequate for coyotes, effective range depending on velocity. Above that, the .204 Ruger and all the .22 centerfires are fine for coyotes.

Hornady’s Seth Swerczek with a .17 HMR, shooting prairie dogs from field positions. The little .17 HMR punches far above its weight class, surprisingly effective to 200 yards…until the wind comes up.

I do little specific coyote hunting. The majority I take are targets of opportunity while hunting other game. This means I’m usually carrying a centerfire adequate for deer-sized game. Effective for coyote control, but don’t expect salvageable skins. A partial compromise is to use a milder .22 centerfire like the .223 Rem with non-expanding military or FMJ match bullets. Caliber-size entrance and exit holes are common. Just check your regs; non-expanding bullets aren’t legal for hunting in some jurisdictions. Also, poor choices for other varminting. Frangible “varmint” bullets aren’t quick-expanding just for explosive effect; also, to reduce ricochet.

They look cute, but prairie dogs consume prodigious quantities of grass and destroy pasture with burrows and mounds. They offer a target of maybe 12x3 inches, a difficult mark on the usually-windy prairie.
They look cute, but prairie dogs consume prodigious quantities of grass and destroy pasture with burrows and mounds. They offer a target of maybe 12×3 inches, a difficult mark on the usually-windy prairie.

The varmint hunting I know best is small rodents: Ground squirrels in California, prairie dogs on the Great Plains, both found in colonies. I’ve done some rockchuck shooting in the West, but I can count all the woodchucks I’ve shot without taking my shoes off. Power isn’t an issue. I’ve had great fun shooting prairie dogs with .22 Long Rifle hollowpoints, Some serious Eastern hunters make a game of stalking woodchucks with rimfires.

Introduced 96 years ago as America’s first varmint cartridge, the little .22 Hornet is faster and more effective than it looks. Also shockingly accurate, as proven by this CZ .22 Hornet.

Wherever, shooting rodents isn’t about raw power, but about accuracy and range, which sort of go together. Prairie dog shooting is perhaps the most demanding of raw accuracy. Small targets open country, usually windy. An adult prairie dog might offer a target as much as twelve inches nose to tail, more like three inches from brisket to backline. Presentation may be anything, but is usually either standing vertically, or horizontal. Either way, there’s a large target in one direction, very small the other.

We typically judge rifle accuracy by average group size. In America, usually at 100 yards. For a hunting rifle, the Holy Grail is generally one Minute of Angle (MOA), even for mountain game. One MOA means one inch at 100 yards, natural dispersion spreading to two inches at 200 yards, three inches at 300 yards, and so forth.

The Ruger No. 1 isn’t known for tack-driving accuracy, but heavy-barreled models are often surprising. This is Boddington’s favorite varmint rifle, a stainless-and-laminate No. 1 in .204, a genuine half-MOA rifle.

On the windy prairies, and with animals often moving while bullets are in flight, there’s no such thing as hitting prairie dogs with every shot. I prefer hitting to missing. When I inevitably miss, I like to understand why, then correct with the next shot. Doesn’t do me any good to miss because I’m out of accuracy. So, for a general-purpose prairie dog rifle, one MOA accuracy isn’t enough. That means I’m beyond Minute of Prairie Dog at 300 yards. That’s a fair poke on a prairie dog-sized target, nobody hits them all. However, if you start with one-inch groups at 100 yards, naturally expanding groups will cause misses beyond 300 yards. Since I like hits better than misses, I expect a serious prairie dog rifle to do better. No such thing as too much accuracy for small varmints. Also, no limited to how far one can shoot at prairie dogs! Only a few blessed and gifted rifle barrels will deliver one half MOA groups on a consistent basis, but that’s the goal.

This heavy-barreled Ruger No. 1 in .204 Ruger belongs to Gordon Marsh. He and Boddington both believe the .204 is the best all-around choice for prairie dogs: Plenty of range, but mild recoil allows calling shots through the scope.

It’s not about cartridges. However, my heavy-barreled Ruger No. 1 in .204 Ruger will do that. In May 2024, I was delighted to see that friend and prairie dog shooting partner Gordon Marsh found a No. 1 in .204 that will also do that. I’ve had various other .22 centerfires that grouped as well or better, also 6mms and some larger cartridges.

That level of accuracy is not essential. It’s just that, with less accuracy, effective range is limited. Well, absent wind-bucking and trajectory-flattening velocity, range is limited anyway. On prairie dogs, that’s part of the fun; just depends on how personal you take misses.

Gordon Marsh on the bench in a prairie dog town with his heavy-barreled Savage .22-250. When the wind comes up and shots are long, it’s time for the “big gun.”

The last time I shot prairie dogs with a .22 rimfire was with a Ruger 10/22 target rifle. It averaged .75-inch 50-yard groups across several loads. Theoretically, Minute of Prairie Dog to 400 yards. Between ridiculous holdover, huge wind deflection, and long flight time, you’re not going to hit many prairie dogs at 400 yards with a .22 Long Rifle. Once I figured holdover and wind, it was deadly at 100 yards, and I was surprised at how consistently I could hit at 150 yards. Then, I was done, time to break out a faster cartridge.

 An accurate .22 LR is a wonderful varmint rifle, just need to keep shots short. This Ruger 10/22 target model was wonderful fun on prairie dogs, effective to a bit past 100 yards.
 An accurate .22 LR is a wonderful varmint rifle, just need to keep shots short. This Ruger 10/22 target model was wonderful fun on prairie dogs, effective to a bit past 100 yards.

In our prairie dog group, Bill Green and Ronnie Whitten love their .17 HMRs. Amazing accuracy, uncanny performance. I’ve seen them hit prairie dogs at 300 yards too often to be flukes. However, the .17-caliber’s light bullets are extremely susceptible to wind, great training to learn to deal with it, but the .17 HMR is pretty much done at 200 yards.

Gordon Marsh in a Wyoming prairie dog town with his suppressed CZ .22 Hornet, amazingly effective to nearly 300 yards. Behind him, Bill Green is shooting a .223, always an effective varmint cartridge.

This year, Gordon borrowed another page from my book and also brought a CZ .22 Hornet. Introduced in 1930, the Hornet is America’s first factory varmint cartridge. Despite its archaic rimmed, tapered case, it is shockingly accurate and surprisingly fast; lighter bullets can be loaded to nearly 3000 fps. Fitted with a suppressor, the little Hornet turned out to be Gordon’s primary prairie dog rifle this year. When it was calm, I was impressed to see how consistently he was hitting clear to 300 yards. When the wind came up, he was done, needed something faster.

Left, a heavy-barreled .22-250; right, a .25-06. Both these rifles have the extreme accuracy needed for long-range varminting. A .25-06 with light bullets is probably the most powerful cartridge that makes sense for varminting. Above .22, a primary drawback is too much recoil.

Since power isn’t an issue, prairie dogs can be shot with anything that’s accurate enough. Kansas friend Vance Cain told me he used to shoot prairie dogs with his .458. When I was a kid, I shot a lot of prairie dogs with my .264, and my “go-to” was a .243. Many folks use various 6mms and .25-calibers with light bullets. The .22-250 reigns as the most popular “fast” varmint cartridge. I used the .22-250 for years, and Gordon always has his heavy-barreled Savage .22-250, his “big gun,” brought out when the wind comes up or only distant ‘dogs are visible.

A 6mm ARC set up in a prairie dog town. Accurate and flat-shooting, all the 6mms are effective for varminting. The major drawback: Too much recoil to call shots through the scope.

There are many great varmint cartridges: All the .17s, .20s, .22s, even the 6mms and .25s if one prefers. Some are old, some new. Both the 6mm ARC and brand-new .22 ARC have been wonderfully successful. The .22 ARC has similar velocity to .22-250, but AR-compatible, and barreled with faster twist to use heavier bullets, which buck wind better, but produce more recoil.

Although there are many other good choices, these are Boddington’s favorite varmint cartridges, left to right: .17 HMR, .22 Hornet, .204 Ruger, .223 Rem, .22-250. On a given day, which is used depends on game, distance, and wind.

Unlike much varmint shooting, prairie dogs tend to offer multiple opportunities. So, for me the ideal prairie dog rifle has lots of reach, but mild enough recoil to allow calling shots through the scope. Call the wind, take the shot, see the strike, reload and adjust. The .223 allows this. Unless very heavy, the .22-250 bounces just a bit too much, as do all larger cartridges. The .204 is faster but, with lighter bullets, has less recoil; it has become my favorite all-around varmint cartridge.

PRAIRIE DOGS AND PLAINS GAME

these days, long-range shooting is “in,” with many shooters working hard to expand their range envelopes. There’s a lot to this. Knowledge of trajectory, art of reading wind. Cheek weld, breathing, consistent trigger press.

By

Craig Boddington

These days, long-range shooting is “in,” with many shooters working hard to expand their range envelopes. There’s a lot to this. Knowledge of trajectory, art of reading wind. Cheek weld, breathing, consistent trigger press. At distance, all the little things matter. However, in all field shooting, getting steady enough to take the shot is critical. Just how steady one needs to be is a relative thing; depends on distance and size of target. Successful field shooters learn how to get steady—enough—from a wide variety of field positions.

Sticks-Tripod-P-Dog
Sticks tripod P-Dog: Prairie dog “practice,” using three-legged African shooting sticks, broken down for a sitting position. If you can hit prairie dogs consistently, no big game shooting is daunting.

In a few days, I’m headed to a near-annual prairie dog shoot in eastern Wyoming with friend Gordon Marsh, proprietor of this site. We’ll start shooting from portable benches, not as steady as a concrete bench, but better than any field position. A prairie dog offers a target about two inches by six. At 300 or 400 yards, not much to shoot at.

For field shooting, the prairie dog is the best teacher I know, not just because the mark is small, but because of windy prairie. Doesn’t take much breeze to blow a light varmint bullet clear off the mound. I was fortunate to do a lot of prairie dog shooting when I was young, great training. I still look forward to every refresher course. Typically, I’ll shoot for a while off the bench. Great for precision, but limited learning from the great teacher. After a while, I’ll rove the edges of a colony, shooting from field positions. Hit ratio goes down, but this is the best training of all.

Sticks-Javelin
The Javelin bipod/tripod system from Spartan can be variously configured, including as a dead-steady fore-and-aft system

For most long-range shooters, a bipod is a primary stability tool. With practice, prone off a bipod is almost as steady as the bench. Tricks include loading the bipod with forward pressure, using a light sandbag under the butt to get the height perfect, then using a daypack under your supporting elbow. Many long-range shooting instructors stress use of a bipod. To a fault, because no single solution works under all conditions.

Sticks-fore-and-aft-P-Dog
Sticks fore-and-aft P-Dog: Boddington “working out” with fore-and-aft sticks in a prairie dog town. This was the first time he used this type of sticks. Steep learning curve but, once you get the hang of them, the stability is marvelous.

Late spring is also the start of peak safari season in Southern Africa. Not uncommon for me to train on prairie dogs, then get serious on plains game. This year I’m going straight from Wyoming to Mozambique. Here’s something prairie dogs and plains game have in common: Prone-off-bipod isn’t a good solution for either. Where we shoot prairie dogs, sagebrush gets in the way, precluding prone. Sometimes you can lay on top of an old mound and gain a bit of elevation. Just be careful of flopping down on the prickly little prairie cacti. And be mindful of prairie rattlers. In Africa, all plants have nasty thorns and low vegetation often precludes a prone position. Never mind the creepy-crawlies that might be on the ground.

Sticks-fore-and-aft
Sticks fore-and-aft: In South Africa’s Eastern Cape, these hunters are set up to take a long shot off of fore-and-aft sticks. Look at the typical vegetation; this is why African hunters use elevated shooting sticks…to get above that stuff.

I’ve carried bipods in open country since I was young. The Harris bipod was the original and still excellent, attaching to the fore-end via the front sling swivel stud. For pronghorns, I like models with extending legs long enough for a sitting position, getting you over low vegetations. With the popularity of long-range shooting, there are now many options from several makers. These days I usually carry a light carbon fiber Javelin bipod, either on my belt or accessible on my daypack. The Javelin attaches via a strong magnet that replaces the front swivel stud, quickly available when needed, not on the rifle when not.

I’m not an extreme-range shooter on game, very much a “get as close as I can guy.” For sure, I won’t back up to take a shot! However, I’d rather have a deliberate steady shot at distance, rather than risk bumping an animal.

Sticks-fore-and-aft practice
Sticks fore-and-aft practice: On the range in Mozambique, PH Ben Rautenbach demonstrates how to set the rifle on fore-and-aft sticks. With practice, this new breed of shooting sticks can essentially double one’s effective range off of stick.

While I take few animals from a classic prone-with-bipod setup, I still find the bipod a useful tool. Often, I’ll put the legs on a rock or log, or on top of a pack to, to get the height right, or to get over low vegetation. Any potential field shooting positions, no matter how weird, can be practiced on the range…or in a prairie dog town.

The problem with bipods or any other favorite shooting position: Too easy to get complacent, married to one shooting solution. I’ll have a bipod in Wyoming, keep it handy in Africa, doubt I’ll use it over there.

Sticks-double-2
Using two sets of sticks on a wide-open Mozambique floodplain, Boddington took this hartebeest at 425 yards. With one set under fore-end, the other under buttstock, near-benchrest stability is achieved.

Last few years, in larger safari camps. I’ve been surprised at how many Americans bring long-range rigs to Africa, suggesting to me that I haven’t appreciated the breadth and popularity of the extreme-range movement. Mostly good. Fast 7mms and .300s with heavy bullets are perfect for African plains game,. Good scopes help everywhere, and there are places over there where you can reach out: Hills, mountains, deserts, floodplains. However, I’m disturbed by the number of hunters I see who struggle because they expect to lie prone with bipod, like their instructors taught them. For this I blame American shooting instructors, awesome technical marksmen, but lacking in either field experience or imagination.

Sticks-chicken wing
Sticks-chicken wing: The “chicken wing”: Using a second set of sticks under the shooting-side armpit. Amazing how much extra stability this offers

Set-piece prone with bipod rarely works in Africa. There are good reasons why African hunters have long relied on three-legged shooting sticks. Fast to set up, fast to get into position. Standing on sticks, you are above the thorns, and can take shots impossible from lower positions.

The problem with traditional three-legged sticks: They are never perfectly stable, a short-range solution. How far depends on one’s ability, and amount of practice. Most people can quickly become deadly to at least 150 yards, somewhat farther with practice. Wife Donna is awesome off sticks; despite my 40 years of practice to her 20, she’s steadier than me. Even so, 200 yards is a long poke off sticks.

Sticks-buddy
Sticks-buddy: Stability off sticks can be enhanced by having a buddy grasp the sticks and offer a shoulder for the shooting elbow. Good trick to practice on the range.

With today’s equipment, many people want to shoot farther and can. There are tricks that help. A second set of sticks under the rifle butt can create a near-benchrest situation. Or, under the shooting-side armpit, what the instructors at the SAAM shooting school call “the chicken wing.” Or stabilizing the shooting side elbow. Can’t do much to change Africa’s terrain and vegetation, but this stuff, too, can be practiced at home. Never forget, all position practice can be done with a .22, reducing cost, blast, and recoil.

Last few years, many African PHs have abandoned traditional three-legged shooting sticks in favor of newer designs with additional struts that support both butt and fore-end, what I call “fore-and-aft” sticks. Sounds awkward, but they work. Like everything else, they require practice, but dual butt and fore-end support greatly enhances stability and extends range. Just how much depends on the person (and, always, how much practice), but I’m convinced they essentially double effective range off sticks. Not as steady as prone-with-bipod, but in the African context, they work.

sticks-22
Donna Boddington practices off traditional three-legged shooting sticks with a .22. Donna is unusually steady off sticks, but three-legged sticks alone offer a short to very-medium-range solution.

With enough practice, I’m not sure there’s a limit. There are now several varieties of these fore-and-aft sticks. The first ones I saw was “4 Stable Sticks” out of France. At first I thought they were the work of Satan, but after I got the hang of them, I saw the value. Since I use prairie dog shooting as training for big game, I took a set to Wyoming a couple years ago and used them for my “roving” prairie dog shooting. A few weeks later, I used them in Africa. With a bit of practice, amazing stability.

Prone with bipod
Done right, prone with bipod is almost as steady as a bench. Useful position to master, but not practical in many field situations

I figure: If I can consistently hit prairie dogs with confidence at a couple hundred yards, then no shot at a big game animal should be daunting. I’m surprised at how frequently I’m now seeing these “fore-and-aft” sticks in Africa: I’ve encountered them recently with Zambeze Delta Safaris in Mozambique (awesome on the floodplains); and at both Frontier Safaris and John X Safaris in the Eastern Cape. Longer shots are likely there because of terrain relief, but low, prickly vegetation makes shooting prone problematic.

2023 kudu off sticks 500 yards
2023 kudu off sticks 500 yards: NOTE: LAST REFERENCE IN TEXT. Boddington and PH Fred Burchell with a good East Cape kudu taken using fore-and-aft sticks at 500 yards, a near-impossible shot off traditional three-legged shooting sticks

Last year, at Frontier, PH Fred Burchell was using fore-and-aft sticks. Last evening, near sunset, several kudu cows boiled up out of a canyon, followed by an excellent bull. Old friends, Fred and I are a good team. Sticks up, rifle steady, Fred ranging. I got on them quickly, but they were all mixed up in fading light, no chance for a shot, distance increasing. Finally, on top of the far crest, they separated. The bull lagged, 500 yards, quartering away. Take it or leave it. Common sense said to leave it, but I was steady, and both I and the rifle had been shooting well. The shot felt good, looked good, but of course they trooped over the skyline.

Bipod P-Dog
Gordon Marsh uses an old prairie dog mound to get a bit of elevation. Watch out for cacti and rattlesnakes.

The bull was stone dead just over the ridge. For me, that would have been an impossible shot off traditional three-legged sticks, and no way anyone could have shot from prone. Doubt I could have done it without practicing on prairie dogs. Which I’ll be doing in a few days, then moving onward to plains game.

STUFF HAPPENS

By

Craig Boddington

I am a firm believer in Murphy’s Law: Whatever can go wrong, will. And its First Corollary: At the worst possible time. Mr. Murphy lies in wait for the unwary and unready. In our worlds of shooting and hunting, there are all kinds of things that go wrong. Much can be prevented by preparation but, even with the most careful planning, stuff can still happen.

A cull buck taken on the last day of the ’21 Kansas whitetail season. Boddington missed a much better buck a few days earlier because the elevation turret—with no zero stop—got spun taking the rifle out of a soft case.

Sometimes we do it to ourselves. There’s something to be said for the KISS principle: Keep it simple, stupid. With shooting at longer ranges so popular today, most of us have gone to “dialing holdover” using our elevation turrets. No question, this is the best and most precise way to adjust for distance. With today’s wonderful optics, more consistent than any reticle system.

However, dialing the range is fraught with human error. Can anybody who “dials” a lot honestly say that he/she has never dialed incorrectly? Or, forgotten to return to zero after firing a shot? As common and more dangerous, forgetting to return to zero after not firing a shot?

On this hunt in New Zealand, Boddington chambered a round in his .300 H&H, worked the bolt, and found the bullet stuck in the lands and the magazine packed with propellant granules. Just one reason why it’s essential to run cartridges through the magazine before a hunt.

Not all of today’s great scopes have a solid zero stop. Probably not so critical in competition, but in my view essential on a hunting scope…because stuff happens. In Alaska a couple years ago, young Josh Mayall came into caribou camp with a few days of the season left. He’d be packing during the follow-on brown bear season, but he had a caribou tag. He had the outfitter’s .375, but he’s left-handed like me. I’d just shot a fine caribou, knew my 6.5-.300 Weatherby was zeroed, so I offered it to him, fortunately with plenty of ammo.

Josh and Peter Mayall with Josh’s amazing caribou, taken with Boddington’s 6.5-.300 Weatherby Magnum. After the first shot, the turret dial got spun going through willows; an anti-Murphy miracle that they got this marvelous bull.

Hunting with his father, Pete Mayall, their first afternoon they saw a giant caribou. Josh hit it, then couldn’t hit it again. After the first shot, the caribou and hey needed to cross a thick willow bottom to reposition. All we can figure: Crawling through brush, the elevation turret caught on a branch and spun. Fortunately, the caribou was hit hard; they finally got close enough for a finishing shot. Stuff happens.

Case head separation with a Savage 99 in .300 Savage. Inspection of brass will usually reveal potential cracks…but not always. The only solution on this rifle is to discard cases after one reload.

Happened to me in the ’21 Kansas whitetail season. Easy shot at close range, clean miss. Checked zero, two feet low at 50 yards. That dial got spun hard. I’d had the rifle in a soft case in the four-wheeler that morning, dial must have spun when I took it out of the case in the dark. Depending on the scope, you can usually figure out how much it spun and bring it back to zero. This one had spun a complete revolution. Unlikely, but stuff happens.

Boddington believes a hunting scope needs a solid zero stop on dial-up turret. The current generation of Leupold’s CDS Turret has one of the best turret stops, solid and high visible.

The only real solution is to find a target immediately and make sure. This just happened to me in Africa, good scope with tight turret clicks. Again, spun taking it out of a soft case. Only a few clicks, could have been a full revolution. We went straight to the camp range.

Mr. Murphy lies in wait, but much of the stuff he loves to pounce on is preventable. We can harp on checking screws and straps and such until the cows come home, but we don’t always do it.  Ever had a sling break or a sling swivel stud strip out? I’ve had both. Depends on where and when it happens. Can make the rifle a fulcrum, almost certain damage to rifle, scope, or both.

There’s no predicting what load a certain rifle will group best with…until you try. This particular 7mm-08 likes Hornady’s inexpensive American Whitetail load, with plain old 139-grain Interlock bullet.

How carefully do you check your ammo? For hunting, it’s downright dumb to not run every cartridge you’re taking in and out of your chamber. I must not have done that at least once. I was far up on a mountain in New Zealand with a .300 H&H, charged with handloads that shot quarter-inch groups. Accuracy didn’t mean much when I chambered a round, didn’t fire, cleared the rifle, and had a bullet stuck in the lands and a magazine full of propellent. The latter was a matter of dumping and swabbing. The former was a real issue, not like we had a cleaning rod on the mountain. After much experimentation and trimming, I finally crafted a long, straight sapling that could be used as a ramrod.

It was a day past the last day when Boddington took his Wyoming bighorn. Nothing went wrong on this hunt. Just to make sure, after this ram was spotted the previous day, Boddington insisted on checking zero on a rock.

Factory loads are not free of issues, but handloads are more likely to cause ammo problems, for lots of reasons. Just now, I was in South Africa with a gent shooting a .300 WSM. Some of his handloads had been made from full-length-sizing and trimming .325 WSM cases. Sound enough, but he’d held the resizing die a few thousandths loose. Intermittently, some of his cases were refusing to extract. Basically, his rifle became a single-shot…and somebody needed to carry a ramrod on every stalk.

On arrival in Georgia deer camp Boddington opened his gun case to find the stock of his .30-06 snapped off at the wrist. Glue and duct tape, and the rifle was still in perfect zero.

My reloading stuff was packed away for years, back up today with a new reloading shed. I’m loving it, shooting mostly handloads again. I trust my handloads, don’t shoot anyone else’s. However, inspection is constant and continuous. All cases stretch during firing, but cases in rear-locking actions (most lever-actions) are especially notorious. Stretching reduces case life. Properly, we examine fired cases for a “ring” that suggests incipient case head separation. Unfortunately, that ring isn’t always obvious. I was taking my .300 Savage to the range for one more check before a hunt. If there was a tell-tale ring, I didn’t see it. Doesn’t matter, because on firing only the base of case ejected; the rest of the case remained in chamber. No damage but getting the rest of the case out required trip to a gunsmith. That rifle didn’t go on that hunt. In future, I’ll only hunt with that rifle with maximum once-fired brass. 

Larry Tremaine brought his suppressor to Kansas deer camp and used it on Boddington’s Mossberg 7mm PRC. Fine, suppressors can be switched back and forth…but it’s essential to check zero.

Although the paperwork is draconian, suppressors are wonderful tools. Provided threads are the same, you can switch a suppressor from one gun to another, handy. Except, almost like switching a scope, you must remember to check zero. I was on a whitetail hunt in Nebraska when my hunting partner missed what might have been the buck of the season. He’d switched his suppressor to a lever-action .45-70 and had forgotten to check zero. Murphy loved it!

In many rifles best accuracy is obtained by seating bullets just off the lands. Important to carefully check Cartridge Overall Length (COL) to make sure cartridges aren’t too long for magazine or chamber. At the range, double-check to make sure.

Hopefully, we all know it’s essential to check a rifle on site or in camp at the start of any hunt. We’ve all failed to do this, but that’s inviting Murphy to join the party. In our Kansas camp, we ask hunters to arrive early afternoon the day before, and I have our range all set up. Last year, just one of my hunters declined to check. Well, you can lead your horse to water, but you can’t make it drink. First morning he missed what he described as “the biggest buck he’d ever seen.”

Too late, we checked his rifle. It was off a couple of inches. Not really enough to cause a miss at the distance he shot, but I like to have things perfect at the start of a hunt.

Before a hunt, Boddington likes to clean at the range…and then fire two fouling shots. This is a good time to run every cartridge you’re taking through the magazine and into the chamber, making sure of smooth chambering and feeding.

Hopefully it doesn’t happen often, but once in a while everybody misses. Usually, I know what I did wrong, but if I’m not sure I like to check zero, just to be certain. Last month, in South Africa, I got into camp early enough to check zero that afternoon. Shooting at plates was a mistake. Always better to shoot a proper target but seemed okay. First day I missed an impala, PH Fred Burchell calling the strike to the left. Hmm, longish shot, felt like I could have been high or low, but to the left didn’t make sense. So, we repaired to the range. Sure enough, the rifle was shooting a bit left.

This Weatherby 6.5-.300 was in perfect zero for a caribou hunt and dropped Boddington’s bull with a 300-yard shot. Boddington then loaned it to a friend and Murphy stepped in. The elevation turret lacked a zero stop and got spun while going through brush.

Stuff happens, and you never know when—or why—a scope might shift zero. On longer hunts, and especially on tough hunts, I like to check zero every few days, just so I don’t unwittingly invite Mr. Murphy to join me. Some hunts are tougher than others. I got my Wyoming bighorn on the eleventh day of a ten-day horseback hunt. The previous afternoon outfitter Ron Dube finally glassed up a mature ram. He was far away, no way we could get on him that afternoon. No way I wanted to mess this up after ten days of tough sledding. I insisted we stop and shoot at a rock, just to be sure. The rifle still in zero, we slept on the mountain that night and shot the ram late the next morning.

Other stuff can happen. Twice I’ve opened gun cases to find stocks broken off at the wrist. I’ve seen two other stocks break in vehicles, and one more from recoil. In case you have any question about which is stronger, wood or synthetic, all five were walnut. Laminate is probably the strongest of all, although the heaviest. Years ago, I got into deer camp in Georgia to find the stock snapped off on my then-favorite .30-06. No spare rifles available, just one more use for duct tape. I fitted it together, wrapped it in duct tape, and went out to check zero. Murphy was there, but I got the last laugh. The rifle was still in perfect zero, shot two nice whitetails with it.

SHOOTING IS SHOOTING…sort of…

By

Craig Boddington

We live in an age of specialization…in almost all things. Instead of gunwriters, today we mostly have handgun writers, rifle writers, shotgun writers; few among us do it all. The gunwriters I grew up reading were more versatile. Elmer Keith was highly skilled with all three tools, and wrote about them almost equally. My old friend Colonel Charles Askins equally so: Multiple times national pistol champion, renowned live pigeon shooter, successful competitor in various rifle disciplines. Jack O’Connor is best remembered as a rifleman, but his work included the excellent The Shotgun Book. O’Connor did comparatively little handgun writing, but he did a lot of handgun shooting, including in competition.

Great shotgunning writer the late Nick Sisley, in the middle of a covey rise. You can bet he exhaled—sharply—when the birds erupted, and he’s taken an extra half-second to square his position and plant his feet while the shotgun is coming up.

That was a common thread for that generation: Most gunwriters competed in various disciplines. In part, this was a product of their time. Games like three-gun, combat pistol, cowboy action, sporting clays, didn’t exist. Competitive disciplines were set-piece and formal, but that shooting was available.  Across most of the country, game numbers were down, but targets are always in season. So, the gunwriting greats of yesteryear did a lot of target shooting with rifles, handguns, and shotguns.

Sporting clays: Any and all clay target shooting is good training for wingshooting. Sporting clays is probably the best, because the variety of distances and shot angles varies infinitely from course to course.

Some of my peers and colleagues pursue modern games, such as PRC, three-gun, and various handgun disciplines. A few make the annual pilgrimage to Camp Perry for the most traditional disciplines. Me, I haven’t actively competed for ages. When I was young, various shooting games were all-consuming. I grew up shooting American trap, some skeet, was good (never great). In college, I competed in smallbore, both rifle and pistol, and shot service rifle and pistol in the Marines. Again, I was good (never great), but I have trophies, medals, and badges won with rifles, handguns, and shotguns. Honestly, with all the great hunting opportunity we have today, I haven’t compete for years. I still practice (a lot), but all this gave me a pretty good all-around background.

I’ve been mostly pigeonholed as a rifle writer. Wasn’t always that way. I once did a lot of shotgun writing because that was what I knew best. Today, the publications I write for don’t use much shotgun content, so scattergun assignments are infrequent.

Running boar target: Because of the popularity of driven hunts, European hunters have access to “running game” targets on most ranges. Because of this, they have no fear of moving game and tend to be good at it. For Americans, Boddington believes shotgunning is the best teacher for moving targets

As a young writer, I also did a lot of handgun stuff. The magazines I started with used a lot of handgun content, and economics and experience were also factors. A story—handgun, rifle, or shotgun—requires only visits to an appropriate range and time taking photos. Hunting stories require time in the field. Doesn’t have to be costly. Hunting deer behind your house can produce material as valuable as any exotic hunt. However, it takes time to gain enough experience to write authoritatively and credibly about most hunting situations.      

This outgoing target was centered on a sporting clays course. Whether birds or clays, hitting flying targets is mostly about keeping your head on the stock, swinging smoothly, and pressing the trigger at the proper instant.

Regular practice is essential for consistent shooting performance. However, shooting is like riding a bicycle or driving a car; once you have basic skills, you don’t have to relearn from ground zero. All shooting is about eye-hand coordination and concentration. So, shooting is shooting, and all shooting has at least some value for all other shooting. However, there are some radical differences among our three basic firearms.

Today, I lay no claim to being as versatile as the long-gone greats. Handguns are my weakest suit. In large part, because I have the least interest in them. I shoot handguns enough to maintain personal defense skills, and at one time I did a fair amount of handgun hunting. However, I’m not as fascinated by pistols and revolvers as by the intricacies of rifles and shotguns. As a result, my skill sets are weaker than with long guns.

Donna Boddington on the range with a SIG-Sauer P365 subcompact 9mm, demonstrating most current stance and hand position for fast steel target games.

The competitive pistol shooting I did in my youth was formal one-hand shooting. “Bullseye” competition is still done, but the popularity of steel target games has changed handgunning styles. In the Marines they taught two-handed shooting, but preferred grip and stance have changed. I’ve done some catching up, but I’m a bit behind the times with handguns.

Eastman jackrabbit: The late gunwriter Chub Eastman retrieves a jackrabbit. Where possible, shooting running jackrabbits is the best practice for hitting running game…with rifle or handgun. Absent plentiful jackrabbits, clay targets with a shotgun teaches the needed skills.

Handgun and rifle shooting in common rely heavily on the basics, especially breath control and trigger press. I still like the acronym from the Marines, the BRASS rule: Breathe, Relax, Aim, check Sight alignment, Squeeze. Shooting positions, distances, and capabilities vary hugely between rifles and handguns, but the basics are similar and transferable.

Shotgunning is different…but not always. I recently wrote that my Dad had a terrible time hitting turkeys. Pop was a great wingshooter, not a rifleman. For point targets, whether a turkey or a deer taken with slug or buckshot (or a steel target in Three Gun), the shotgun becomes like a short-range rifle. You must know where it shoots, and aim at the precise spot you need to hit. The good old  BRASS rule applies.

Wingshooting and hitting clay targets are different. Everything is moving: Upper body, your arms, the shotgun…and the target. Except feet and legs. Stance is of critical importance; one of the biggest mistakes in fast upland shooting is to not take the half-second needed to firmly plant your feet. Breathing remains important; you exhale when calling for a target, and when a pheasant explodes under your feet…while you’re bringing the gun up. No time to Relax! You do Aim the shotgun, swinging with the target, establishing the required lead. The swing needs to be smooth and continuous. Stopping the swing is a fundamental error—we all do it now and again.

Many years have passed since Boddington was serious about shotgun competition, but he can still handle a shotgun. On this day in 2007 he won high shooter at the Grand National Quail Hunt in Enid, Oklahoma.

So, no time double-check Sight alignment, either. When the shotgun bead is in proper relation to—and moving with and ahead of—the target, the shotgun is fired. The trigger is not Squeezed, no time for the deliberate, steady increasing pressure as in a rifle or handgun. I think my preferred wording—trigger press, rather than “squeeze”—still works, but it’s a sharper, faster pull. Shotgunners often describe it as “slapping” the trigger. I don’t care for that because it implies a violent action, which can disrupt your aim as surely as jerking a handgun or rifle trigger. When everything looks right, you simply press the trigger hard enough to fire the shotgun in that instant.

Follow-through is equally critical with all three tools. No shot is complete until the projectile hits (or misses) its target. On flying targets, the swing continues through the target breaking or the bird falling. With a rifle or handgun, you stay on the trigger through the shot; it’s a mistake to instantly release it, because of potential to disrupt the shot while the bullet is still in the barrel.

Shooting off the bench is about removing as much human error as possible. The gun is rested as steadily as possible, allowing the shooter to concentrate on breathing and trigger press.

Same with shotgunning except: In wingshooting you continue to swing with the bird, but in case of a miss you must quickly correct for another shot…while the bird is still in range. Preparing for additional shots is the same with handguns and rifles. Flicking your finger off the trigger as the gun fires is a bad habit; Instead, it’s essential to smoothly reset for the next shot (and work the action if required). Lifting your head to admire a shot is another common bad habit…with all three tools. There must be slight forward finger movement to reset the trigger, but the head needs to stay down on the stock or behind the handgun’s sights, ready to fire again.

As with Dad and his several missed turkeys, relatively little in shotgunning is fully transferable to rifles and handguns. Except for one thing: Shooting at moving targets.

This is controversial, as some folks believe shooting at moving animals is unethical. My friend and mentor John Wootters once commented that he’d like to invent a cutoff-switch that prevented firearms from discharging if an animal was moving, this to reduce wounded game. Wootters wasn’t alone; some outdoor TV networks won’t air footage if an animal is moving when shot. Jack O’Connor believed differently, writing that game animals are “just as big moving as standing still.”

AR offhand: With all shooting it’s essential to follow-through: Stay on the trigger until the shot is complete. With repeating actions, forward trigger finger movement is necessary for the trigger to reset, but it should be smooth and minimal.

While I don’t believe in risky running shots, I lean to the O’Connor school on this. Game animals don’t always stop. At closer distances, and always depending on angle and speed, properly placing shots on moving targets is practical with both rifles and handguns…if you know what you’re doing. In O’Connor’s Arizona days, jackrabbits were legion, offering marvelous rifle practice for running game. I’ve never lived where jackrabbits were plentiful enough to offer that opportunity.

Position vary widely, but in rifle shooting breath control and trigger press are always critical.

However, I grew up doing so much shotgunning that I’ve never been daunted by moving shots. The principles are the same: Swing smoothly, keep swinging, establish lead, press the trigger. The only real difference: You use sights or crosshairs instead of the shotgun bead. So, if your shooting or hunting with rifles and handguns includes fast-breaking opportunities at moving targets, spend more time shooting clays. Both trap and skeet are wonderful games, but sporting clays teaches how to handle the greatest variety of shots. Of the three, sporting clays is far the best preparation for wingshooting.

HAVE YOU TRIED AN APERTURE SIGHT?

By

Craig Boddington

Magnifying riflescopes saw some use in the American Civil War, and were preferred by a few bison hunters, including the famous Col. William Dodge. However, it wasn’t until after WWII that scopes were truly perfected and came into general use.

Today, the centerfire rifle world is dominated by magnifying riflescopes. They simplify shooting: Larger image to shoot at, easy to adjust, and so reliable that we trust them completely I’m as guilty as anyone. I started shooting in the 1960s. My first centerfire, a surplus 1903 Springfield, wore open military sights. I didn’t hunt with it back then; my first hunting rifle was a scoped .243. Many years passed before I did any hunting with iron sights.

The biggest limitation to an aperture sight isn’t either range or accuracy, but light. His Winchester 94 .30-30 with Lyman aperture sight is exceptionally accurate for this type of rifle

Folks of my generation might have taken their first bucks with grand-dad’s passed-down .30-30, but many are like me; started with scopes, stayed with scopes…or went to a scoped rifle as soon as affordable. Younger shooters may not have any exposure to iron sights at all. My daughters are good shots and keen hunters, but neither have had much exposure to iron sights. That’s my fault; I started them with scopes, bypassing important lessons. Iron sights make you appreciate the importance of precise sight alignment. Never too late but, trust me, it’s easier to go from iron sights to a scope than vice versa!

Qual day” at Edson Range, Camp Pendleton. Aperture sights were standard on America’s service rifles from WWII until recently. Using an aperture sight, Boddington qualified Marine Corps “expert” throughout his career, not so difficult, and great experience.

Why would you want to? Well, not all field shooting is at distance. There are many situations where the magnified image offered by a scope isn’t needed, and a few where the larger image and the scope’s tunnel-vision effect just gets in the way. Also, under all circumstances, the scope adds weight, bulk, and vegetation-snagging projections.

Savage 1899 hog: A flip-up tang aperture was also a common option on Savage lever-actions. This Model 1899 .250 Savage, made in 1920, wears a flip-up tang sight, used to take this excellent boar.

Sometimes, iron sights do everything that needs to be done. There are two primary types of irons: Open sights, and the aperture or “peep” sight. With both, there is a front sight near the muzzle, usually a blade or a bead. The open variety has a rear sight, typically affixed to the barrel just ahead of the action, usually a horizontal bar with an open notch, commonly shaped as a “U” or a “V.” The idea is to optically center the rear sight in that notch, then superimpose it on your aiming point. The primary problem with open sights: The eye must work in three focal planes: Rear sight, front sight, and target.

The aperture sight has a rear sight with a circular opening, mounted far back, close to the shooting eye, on the rear of the receiver. Also often called a “receiver sight,” it is far superior to the open sight because the eye naturally centers the bead or tip of the blade in that opening. The peep sight reduces the eye’s work from three focal planes to two. You don’t look at the rear sight; you look through the hole, center the front sight, and superimpose it on your aiming point. The aperture sight is more precise, and more forgiving as our eyes grow older, less flexible, and less able to rapidly focus back and forth.

Boddington used his R.F. Sedgley Springfield .30-06 with aperture sight to take this Colorado elk, one shot at about a hundred yards.

The scope further reduces the eye’s work to just one focal plane: Focus on the target only, and put the scope’s reticle on the aiming point. So, and especially for older shooters (like me), a scope or reflex (red dot) sight is optically superior to an aperture. I will not tell you that open sights are necessarily sturdier or less prone to breakage than a modern scope properly set in good mounts. Not always true. Over the years, I’ve had more front sights and rear sights bend, break, or come loose than trouble with scopes. Especially today, open sights on many factory rifles are flimsy afterthoughts; put there for looks, with apparent confidence the customer is certain to mount a scope and will never actually use the irons.

Before riflescopes became common, the best bolt-actions were often adorned with aperture sights. This 1930-vintage R.F. Sedgley Springfield was amazingly accurate with its aperture sight. Boddington admits he couldn’t duplicate this group today, but that’s not the rifle’s fault.

However, open sights, and especially securely-mounted aperture sights, still have a place. Accuracy is not limited or reduced, but depends somewhat on visual acuity. In my day, the service rifle wore no optical sight; I qualified Marine “expert” throughout my career with aperture sights. No problem, but the 300-meter slow fire bullseye looked pretty small. So does a game animal, but such shooting is quite possible, limited only by what you can see. Twenty years ago, I could produce MOA groups with aperture sights on accurate rifles. Those days are over, followed by a period when I had increasing difficulty resolving front sights. I was almost out of business with all iron sights. Fortunately, a good ophthalmologist has me corrected and I’m again confident using iron sights for short-range hunting situations.

On sticks with a Winchester M94 .30-30 with Lyman receiver aperture sight. Aperture sights take practice, but over time it’s amazing how fast and accurate they become.

Before riflescopes were perfected, the aperture sight was the precision hunting sight. Jack O’Connor did his early hunting, including desert sheep and Coues deer, with apertures. Ernest Hemingway did almost all of his hunting with the aperture sight on his famous Springfield.

I love the simple, low profile of an aperture-sighted rifle, and they go well with certain platforms I like. While I don’t trust myself with apertures in open country, I use them for a lot of hog and black bear hunting, even some elk and whitetail hunting, and I’ve used them in Africa for stalking in thornbush.

Again, I won’t harp on the ruggedness versus a scope, and I also won’t make a case for their enhanced speed. Years ago, with gunwriters John Wootters and Finn Aagaard, we did “stopwatch” tests comparing apertures, open sights, and low-power scopes. Starting in down position, from “go” to aimed shot at close targets, the aperture proved faster than open sights, but the scope was consistently faster and more accurate than any iron sight.

Front sight size is a compromise: The smaller the bead (or blade), the more precise the aim, but also the less visible and slower to acquire. For fast field shooting, Boddington prefers a bold bead of 3/32-inch diameter.

Any iron sight is also a handicap in poor light. There is no light-enhancing advantage offered by good optics. Open sights are worse for light than apertures, but even younger shooters with perfect vision will lose shooting light more quickly than with scopes. Older hunters are at increasing disadvantage in bad light.

To a degree, we can increase speed and low-light capability by using a larger and more visible front sight; and a larger aperture. This is a trade-off. The smaller the bead or thinner the tip of the blade front sight, the more precise the aiming point. My preference has long been a bold 3/32-inch front bead, a nice combination between size and visibility. I like a traditional white front bead, but today’s tritium and fiber-optic sights are even better.   

The Skinner ghost-ring aperture is an excellent modern sight, factory-supplied on Big Horn Armory’s top-eject M89 lever-actions. Elevation is adjusting by twisting the aperture up or down, then locking it into place with a set-screw.

Likewise, the smaller the aperture, the more precise the aim. The target aperture sights used when I was shooting smallbore competition had an opening like a pinhead. Very precise, but also slow to acquire.

The opposite is a very large opening. Older aperture sights, such as the Lyman, often came with multiple screw-in interchangeable apertures, small for target use, larger for faster shooting. You can also unscrew the aperture altogether, and simply sight through the opening. “Papa” Hemingway left us multiple references to unscrewing his aperture…and then blowing through the hole to eliminate droplets from precipitation or dew.

This Redfield M25 was a common and favorite receiver-mounted aperture, shown on a 1945 M65 Reising .22 training rifle. With all aperture sights, for adjustment you move the sight the direction you wish to move the strike of the bullet.

The remaining opening, on older Lyman and Redfield apertures I have, measures about .200-inch diameter. This creates what is called a “ghost ring” aperture. Because the rear sight is close to the eye, no effort is made to focus on the sight fixture; it fuzzes out to almost invisible. The eye ignores the sight, concentrating on looking through the opening and focusing on the front sight.

For everyday use in dangerous-game country, I’ve never known an African PH who carried a scoped rifle. Most common is the simple “express” open sight with a shallow “V” rear. Not precise, but as fast as open sights get and, once properly affixed to the barrel, as bulletproof as an open sight can be. This is the traditional sight most PHs rely on for backup, but I’ve known several who preferred ghost-ring apertures, faster and more precise.

Certain models of the recent and current Marlin lever-actions are factory-supplied with Picatinny rail strip, mounted with an adjustable ghost-ring aperture from XS. This is a great sight for a short-range lever-action. This is a recent Marlin 1894 in .44 Magnum with 100-yard target.

The ghost ring aperture was long popular among America’s big woods hunters, and it’s making a comeback, wonderfully common on the big lever-actions we now call “guide guns.” Whether for a guide for backup, or for wilderness wanderers preparing for bear problems, the concept is perfect. The shot will be close, and must be fast. I greatly admire the Skinner ghost-ring apertures, elevation adjustment accomplished by turning the aperture up and down. Recent and current Marlin .45-70 “guide guns have been factory-equipped with an adjustable XS ghost ring on a rail mount, also excellent. Big Horn Armory supplies Skinner ghost rings on their top-eject M89 lever-actions, a perfect match. These are not long-range precision sights, but the rifles they are most commonly used on are not long-range platforms.

A nice South Texas whitetail, taken at about 90 yards with a short-barreled Winchester Trapper .30-30, using aperture sight.

The aperture sight isn’t just for proof against big, bad bears. Today, I consider it a sound option for shots up to roundabout 100 yards. Farther if you can see better. That does me just fine for most of hog hunting, and covers all likely shots from several of my favorite deer stands. I get great pleasure from hunting with apertures. My biggest limitation is light: I will lose the first and last ten minutes (at least). Better plan accordingly.

RANGE DAY

For most of us, a day at the range is just plain fun. Sure, most of us have an agenda: Improve skills, group loads for accuracy, check zero for an upcoming hunt.

By

Craig Boddington

For most of us, a day at the range is just plain fun. Sure, most of us have an agenda: Improve skills, group loads for accuracy, check zero for an upcoming hunt. For some, banging away is pure pleasure, because shooting is fun. It’s fun for me, too; I go to the range for all those reasons.

Range Day starts with loading the truck…and making darned sure nothing that might—possibly—be needed is left behind.

And more, because range day is also serious work. As a gunwriter, I’m always fighting (and juggling) deadlines. Some articles are hunting stories. Others are gun stories, and many, with hunting guns, are a mix. Whichever, range time is important, and precious.

Reasonable weather is almost essential, a big problem in many parts of the country, sometimes impossible on winter days in Kansas. I’m often asked why we haven’t pulled out of California completely. Grand-kids are good reasons, and I often cite the year-around hog hunting that I love. Range days are more good reasons. The range I use, on a friend’s ranch not far from town, is up a deep canyon, cold in winter and blistering hot in summer, but protected from most winds. Except for infrequent rainy days, I can shoot in at least marginal comfort throughout the year. Honest, the ability to get in a range day almost any time I need to has much to do with how I’ve been as prolific and productive as a gunwriter all these years.

Boddington prefers to clean at the range…which means cleaning gear must be hauled. Usually shooting multiple calibers, he brings his full cleaning kit, ensuring he has all the brushes, jags, and patches needed.

Now, it isn’t like stepping out the back door and shooting, as I can do at the Kansas farm (when weather allows). The range is too far from the house to run back and forth. I have to be organized, and make sure I have everything I need.

Often, I take a half-dozen firearms to the range. A couple I need to run through their paces for articles. Always, a .22 to practice with while barrels are cooling. Maybe a favorite hunting rifle to check zero, or to group a new handload recipe. At least one pistol or revolver, just to keep my hand in. Oh, sure, I’ve gotten to the range and realized I forgot to grab ammo for one or another, or maybe I forgot a spare scope in case I want to make a switch.

Boddington’s “range” tool kit is small and simple, including a small set of gunsmithing screwdrivers and bits, and multi-tools.

If I forget something for a gun I need to write about, that’s an expensive waste of time. So, I try to be organized. I make lists—guns, ammo, gear—and I check them off while I’m loading the truck. As for gear, I don’t need to haul everything. We have a little range house that holds targets, rests for the bench, shooting sticks, staple gun with lots of staples.

RANGE BAG

Most of what I need to bring stays in my Range Bag. Hunting buddy Gordon Marsh, proprietor of this site, and our mutual friend, Bill Green, spent a lot of time creating the “Boddington Gear” (www.boddingtongear.com) you’ll find on this site: Soft gun cases, range bags, and more. Available in good waxed cotton and excellent buffalo leather, I’m really happy with these products. The real point is: A great deal of thought went into the design.

The Boddington Gear range bag, available in buffalo leather or waxed cotton, is roomy enough to hold almost anything needed, including range spotting scope with bench tripod.

Good soft cases are essential to protect and safely transport valuable firearms, but my writing business truly depends on the range bag. I designed it large, because I haul a lot of stuff back and forth to the range. Side and end pockets are roomy enough to hold handguns in rugs…and a staple gun. I carry a spare in the range bag, ‘cause I’ve had them quit just when I needed to change targets.

Most of us who care about accuracy save targets, either to compare or brag about. I’m big on this, because when testing firearms, I have protocols to meet, as in “five five-shot groups with multiple loads.” I must save targets, so I can measure groups and photograph them later. I have two options. The range bag has a built-in file folder, not just for targets, but for instructions and other printed info. And, I have my buffalo leather target case, a cylindrical tube that allows me to roll up targets and save them with no damage. (Don’t save targets? It’s also a perfect fit for a straight-ocular-lens spotting scope.)

Good soft cases are essential for transporting and protecting valuable firearms. Boddington put a lot of thought into his soft gun cases and likes the results.

Now, regardless of what range bag you prefer, here’s the stuff I cram into mine for almost every range day. A small set of gunsmith tools, so I can tighten up screws or switch out an optic on the range as needed. A PAST recoil shield, used religiously for shooting off the bench with almost anything from .30-caliber up. Our Marine Corps mantra was: “Pain is good. Extreme pain is extremely good.” Sorry, but we shoot better when recoil doesn’t hurt, so at the bench I sissy up. Light, beanbag sandbags, so I can get my benchrest support exactly right. Also, a big leather “competition” shooting glove for the supporting hand. In my case, the right hand, because I’m left-handed. I use it on the bench, and in prone, to snuggle the butt against my shoulder, and to make fine elevation adjustments, keeps the rear sling swivel stud from barking my hand.

Naturally, shooting glasses and earmuffs! A spare left-hand strap on cheekpiece so, as needed, I can get the cheek-weld just right, often essential with unfamiliar test rifles, especially with today’s ever-larger scopes that must be mounted higher. And, down deep in one of the pockets, spare batteries—for any device you carry that might need a battery!

On the range with the MagnetoSpeed chronograph, measuring bullet speed with electromagnetic impulses. This is it; the case is underneath the monitor. Light, compact, fast to assemble and easy to use, this chronograph lives in the range bag, and can be taken anywhere.

Since part of my range days involve “test guns,” I carry a digital trigger pull gauge. Mine is from Lyman, stores multiple tests and yields the average. A chronograph is another essential device, invaluable for handloaders and long-range shooters, and a required work tool for me. The Oehler 35P has long been the gold standard; I’ve had one for 40 years, love it because it yields all needed data on a printout. However, the Oehler is bulky, stores in its own separate hard gun case, and takes time to set up. A few years back, I got a Crony, compact and easy to use, range-bag compatible. My buddy, who owns the ranch and thus the range, also has a Crony, keeps his in the range house, so it’s available on that range. The Oehler and Crony operate off skyscreens, detecting the passage of the bullet. The Oehler is absolutely accurate, but skyscreens are finicky in some light conditions.

The range Boddington uses most frequently has various rest options for the bench, but he keeps several lightweight “beanbag” sandbags in his range bag so he can adjust for a perfectly steady rest.

Recently, I got a MagnetoSpeed, measuring speed with electromagnetic sensors. The MagnetoSpeed Sporter now lives in my range bag. Inexpensive, weighs little over a pound, and folds up into its 12×3-inch case, about the size of a cigarette carton. It attaches to the barrel in seconds, stores up to 12 shots in a string, and yields High. Low, Average, Extreme Spread (ES), and Standard Deviation (SD). Mostly a rifle guy, MagnetoSpeed does almost everything I need, and can even go on hunts, to verify velocity and thus long-range data as atmospherics change.

EXTRAS

Note that I said “almost.” MagnetoSpeed cannot be used with suppressors. And, since it attaches to the barrel, is not compatible with semiauto pistols with full-length slides. I just ordered a LabRadar, awesome device, measuring speed with Doppler radar. It will work on almost anything…except shotguns (multiple pellets confuse the radar).

Although fairly compact, LabRadar is a bit large for my range bag, so I’ll carry it separately when I need it. That’s not the only thing I carry separately. My camera(s) go in my daypack, along with binocular, or in a camera bag. The range spotting scope has a small tripod that fits handily in the bag, but if I intend to do some “setup” shots, I take a tripod for camera use.

Boddington keeps a PAST recoil shield in his range bag, and also carries an extra strap-on cheekpiece, invaluable for adjusting comb height…especially with the larger scopes used today, which must be mounted higher.

I like to clean at the range, either when finished, or between series of groups. For most of us, the range bag easily holds a jointed rod and everything else, but since I’m usually hauling multiple firearms in various calibers, I usually throw in my big Tipton cleaning set, about the size of a large toolbox. If I have it, I know I have all the right-size brushes and jags.

Most of us have calm, relatively focused range sessions with just a couple of firearms. The range bag probably has adequate room for all the ammunition needed, but my life doesn’t work that way. On my range days, I may have firearms chambered to a half-dozen different cartridges…with multiple loads for each. I put all my ammo in a separate box or bag, so I can keep it sorted, use one at a time…and then put back when I’m finished with that firearm. However you do it, there’s one cardinal rule: Just one caliber/cartridge on the bench at any time!

GROUP-TIGHTENING TIPS

By

Craig Boddington

BASICS

Shooting groups is all about determining a rifle’s accuracy, little to do with the shooter. That said, it’s essential to ensure your benchrest technique is sound. The platform (bench) must be rock-solid. There’s a reason why most ranges use massive, immobile cement benches. Good sandbags work well, but there’s no substitute for a solid, heavy adjustable rifle rest. Get the scope centered on target and make fine adjustments until it’s perfect. The idea is to settle into the rifle, gain your sight picture, and press the trigger without “muscling” the reticle onto the target.

This falling block .303 was showing vertical stringing, right. Increased pressure on the fore-end screw and a business card shim at the fore-end tip immediately changed the groups from vertical to round. With the right load, accuracy should improve.

Before firing, dry fire a few times, checking the rifle’s position—and your trigger press and breathing. When the trigger breaks there should be no movement at all. If there is, start over and re-adjust the rifle.

Raw accuracy is about the rifle, not the shooter, but first check your technique, and be certain you’re shooting from a rock-solid bench and a good shooting rest.

We’re going to assume you’ve checked all screws (action, scope mount, rings) and made sure all are tight. This is about determining your rifle’s accuracy. If you discover later that a screw was loose you’ve just wasted every shot. Who can afford that today?

SMOOTH THE BARREL

A micro-photo of the inside of a barrel. Even the best new barrels will show tool marks and rough spots. The passage of bullets—and frequent cleanings—will smooth a barrel, usually (but not always) improving accuracy after 50 to 100 rounds.

Everybody has a different cleaning protocol. I’m not OCD about it; I definitely don’t clean a barrel every time I put a bullet through it. However, when shooting for groups, I start with a clean, cold barrel, and I clean it on the range after four or five groups. After cleaning I fire a couple of fouling shots. Cleaning invariably leaves some solvent or lubricant in the barrel, so the first shots may have a different point of impact before bullets have “scrubbed” the barrel. The difference is rarely dramatic, but the fouling shots should not be counted as part of a group. With slender barrels, this may mean waiting for the barrel to cool before shooting a group “for score.”

A free-floated barrel should allow free passage of fairly thick paper between barrel and channel.

Breaking in a new barrel is a different deal! Even the best new barrel has near-microscopic tool marks and rough spots. The passage of every bullet removes a bit of steel, polishing and smoothing the barrel (until, eventually, it’s “shot out”). Every experienced shooter has a personal protocol for a new barrel. Some fire one shot, clean…and then repeat ten times! Again, I’m not that guy, but I clean a new barrel much more frequently! Lapping a barrel is one way to short-cut the process, polishing the bore with a mild abrasive. One method I’ve tried (definitely saves ammo) is a hundred passes with JB Bore Cleaner, a mild abrasive paste.

Action bedding
True “drop-in” stocks are uncommon. The action must be held firmly and consistently in the stock to preclude movement. Even major manufacturers often use bedding compound to ensure secure bedding, especially around the recoil lugs and action screws.

Not all barrels need break-in. Some shoot as well as they ever will right out of the box, but this is rare. There is no magic number, but in my experience, most barrels need 50 or 60 shots (at least half-dozen cleanings) before they settle down. Until then, whether you’re impressed or depressed by your groups, don’t worry about it too much. Experiment with different loads…and don’t start hacking on the bedding! My current mountain rifle is a .300 Winchester Magnum by Kenny Jarrett. It should shoot, and it does, but this barrel was slow to break in, lackluster groups with much load-to-load variance. It wasn’t like it suddenly woke up and started to shoot. Average groups gradually improved…incrementally. Today, with a few hundred rounds down the barrel, it shoots well with any good load, awesome with some, and most of its barrel life lies ahead.

CHECK THE CROWN

A rounded crown is most common on sporting rifles. The crown is surprisingly fragile and easily damaged; the greatest hazard is probably muzzle-down in a vehicle grinding against the grit and dirt on the floorboard.

The muzzle crown is the last thing the bullet touches as it leaves the barrel. It must be cut evenly and concentrically, 90 degrees to axis of bore. It’s not unusual to find an off-center crown and, even if the rifle left the factory perfect, the crown surprisingly fragile and easily damaged. Such as, by grinding muzzle-down amid the gravel and debris of a vehicle floorboard.

If a barrel just won’t shoot the way you think it should—or, if accuracy suddenly deteriorates—it’s amazing how often the culprit is a sloppy crown…even on new rifles. Any gunsmith can recut a crown, and tool sets are readily available; it’s a five-minute job. But, before you do that, it costs almost nothing (one cartridge) to check it out.

To check a muzzle crown, paint it with common typewriter whiteout and fire a shot. You will see blast marks where the rifling grooves meet the crown; they need to be consistent all the way around.

Carefully paint the muzzle, around the rifling, with typewriter “white-out.” Let it dry, and put one cartridge downrange. There will be black lines, “blast marks,” on the white where the rifling grooves meet the crown. In my experience, these blast marks are easier to see on recessed or “target” crowns, more difficult with rounded crowns; you may want to use a loupe to study the marks carefully. 

If the marks are concentric and similar adjacent to the grooves, probably not the crown.  but if one or more marks is smaller or different, repaint the crown and fire another shot. If the same, I’d recut the crown before I tried anything else. It’s amazing how often this proves the problem, with a properly-square crown dramatically shrinking groups.

BEDDING

A free-floated barrel should allow free passage of fairly thick paper between barrel and channel.

Bedding is mating action to stock, and barrel to barrel channel. Tightly and uniformly fitting action to stock is essential to preclude movement. Barrel bedding is a matter of dampening, or making consistent, barrel vibrations while the bullet passes through the bore. The several methods all work…but none work all the time on all barrels. In full-contact bedding, whether with carefully sculpted wood or a bedding compound (like fiberglass), the barrel makes full contact throughout the channel.

Full-contact bedding is the most difficult bedding technique. Free-floating is the opposite, essentially no bedding at all: The barrel makes no contact forward of the action, and the barrel is free to vibrate as it will. This is easiest and cheapest bedding techniques. It works well on some barrels…but no technique works on all barrels. In between full-contact and free-floating are several options. Many makers bed the first few inches of barrel, at the shank, then free-float the rest. Pillar-bedding is a popular variation of this.

To try a business card shim, just loosen the action screws, insert a business card between barrel and fore-end tip and retighten the screws. The purpose is to place a couple pounds of upward pressure on the barrel, which often has the effect of dampening barrel vibrations and making accuracy more consistent.

Then there’s pressure-bedding, building up a pad near the fore-end tip (usually with bedding compound), so that, with the action screws tight, a couple pounds of upward pressure are exerted on the barrel. Inexplicably, but demonstrably, this serves to dampen or make barrel vibrations more consistent. It was a favorite technique with pre-’64 Model 70s which, though often surpassed today, were often exceptionally accurate for their time.

TRY A SHIM!

I’m not big on hacking on bedding; you can drive yourself nuts, usually to no avail. A given barrel is only going to group so well, no matter how much you want it to do better. However, there are a couple of things you can check. If a barrel is supposed to be free-floated (all or part), run a piece of paper between barrel and channel. High spots, especially along the sides, will bear on the barrel and ruin accuracy. This is not uncommon with sloppy factory stocks, and must be relieved.

To try a business card shim, just loosen the action screws, insert a business card between barrel and fore-end tip and retighten the screws. The purpose is to place a couple pounds of upward pressure on the barrel, which often has the effect of dampening barrel vibrations and making accuracy more consistent.

The best trick I know is to try a business-card shim to replicate pressure bedding. I learned this in the 1970s from a pre-’64 Model 70 collector, and I’m still amazed at how often it works. Loosen the action (or fore-end) screw(s) so you can insert a business card between fore-end tip and barrel. Depending on space, it may take more than one, but, with the card in place and screws tightened, you can feel you’re putting just a bit of upward pressure on the barrel. You can also adjust the placement of the shim, but just behind the fore-end tip is the place to start.

Before and after: Right, a group fired from a barrel with a sloppy crown. Left, a group fired immediately after recutting the crown. With accuracy, results this dramatic aren’t common, but sometimes you get lucky.

This trick is especially good to reduce vertical stringing. Just now, I’ve been messing with Uberti’s Courteney Stalking Rifle, 1885 High-Wall action, one of the two .303 British rifles I mentioned. Lovely rifle but, despite a stiff barrel, it showed vertical stringing. I adjusted pressure on the fore-end screw, which helped. Two thickness of business cards changed the groups from vertical to round.

Boddington’s .300 Win Mag by Kenny Jarrett is especially accurate, but this particular barrel was slow to break in, really coming into its own after more than 100 rounds. Top left group is a final zero at 200 yards.

If this little trick doesn’t help, nothing lost. Remove the cards, tighten the screws. If it works, you can cut the cards to fit, then soak in oil to prevent rust from moisture absorption, or you can replace the cards with brass bar stock. I’ve done this once or twice, but I’ve got several rifles with permanent business card shims!

Couple years ago, I had a test rifle from a well-known maker that wouldn’t shoot like I thought it should. I shimmed the barrel with a business card and shrank the groups significantly. My mistake: I didn’t remove the shim before I returned the rifle. They discovered it and accused me of hacking on their bedding. That manufacturer hasn’t spoken to me since and probably won’t…but it still worked!

STUNG BY A HORNET

By

Craig Boddington

The rimfire .22 Long Rifle is essential. With lack of recoil, low report, and cheap ammo, there’s really nothing better for small game, plinking, and practice. For serious riflemen, a fast “varmint cartridge” between .17 and .22 caliber is almost as irreplaceable.

Depending on preferences, it might be a .204 Ruger, .223 Remington, .22-250, or one of a dozen others. This rifle will be used for small varmints and coyotes in more open country. Not to be ignored, it will also be used to shoot for accuracy, and to improve one’s shooting. Because: Cartridges in this group are capable of extreme accuracy and are easy to shoot.

Barry Burchell and son Frederick
At their ranch in Namibia, Barry Burchell and son Frederick whip up some .22 Hornet loads so hunter Harley Young can borrow their Anschutz .22 Hornet to hunt pygmy antelopes.

Not all of us want a bunch of rifles chambered to different cartridges, and certainly needs differ. Even so, there’s a place and purpose for a cartridge that splits the difference between the .22 Long Rifle and the fastest varmint rounds. Such a cartridge has more range and power than a .22, but is capable of handling somewhat larger game…yet without undue destruction on small game. There aren’t a lot of options in this niche, but the two most obvious are the .17 HMR and its parent cartridge, the .22 WMR (aka .22 Magnum), both great cartridges.

Ammunition is costlier than .22 Long Rifle, but cheaper than centerfires. Of the two, the .17 is faster and tends to be more accurate. However, the .17 HMR is marginal for coyotes, so its utility is limited. The .22 Magnum isn’t as fast, but is adequate for close-range coyotes.

A nice oribi
A nice oribi, taken with the CZ527 .22 Hornet. The oribi is an open-country antelope so, by both size and average shooting distance, approaches the upper end of proper use for the .22 Hornet.

Centerfire choices between the rimfires and fast varmint cartridges are also limited. Certainly, we could include the .17 Hornet and .17 Fireball, but the .17’s bullet is too light for game much larger than a fox. So, in order to get more bullet, we have to look at a couple of old cartridges: .22 Hornet and .218 Bee. Power levels are almost identical; the .218 Bee uses a 46-grain bullet at 2760 fps. The Hornet’s traditional load is a 45-grain bullet at 2690 fps, with modern loads a bit faster.

For handloaders, there’s little to choose between. However, I think the Hornet is the better choice, because of greater availability in rifles and loads. The .218 Bee was introduced in 1938 in Winchester’s Model 65 lever-action, attempting to breathe new life into the old 1892 action. Winchester still loads .218 Bee, but factory ammunition uses blunt-nosed bullets because of the M65’s tubular magazine. A few bolt-actions and single-shots have been chambered to .218 Bee, but it offers no meaningful advantage over the Hornet, and is less popular.

17 HMR, .22 WMR, .22 Hornet, .222 Remington, .223 Remington.
It’s a tough call when you want to take small game or “small big game” cleanly without doing undue damage. A shotgun is often a good choice; with rifle cartridges it’s more complex. On right from top: .17 HMR, .22 WMR, .22 Hornet, .222 Remington, .223 Remington.

The .22 Hornet is a different story! Although its popularity comes and goes, it’s a standard cartridge, consistently loaded by multiple sources, with a variety of bullet weights. Development is credited to Townsend Whelen and G.L. Wotkyns, with the case similar to the blackpowder .22 Winchester Center Fire (WCF). Introduced by Winchester in 1930, the .22 Hornet was the first centerfire varmint cartridge developed for smokeless powder…and it’s still a good one!

35-grain loads are now available that reach 3000 fps. Even so, the .22 Hornet isn’t impressive compared with the many faster .22 centerfires. On the other hand, it offers amazing performance from such a small case, with minimal recoil and good accuracy.

CZ M527
This is the CZ M527 .22 Hornet Boddington took to Mozambique in 2018. A light, slick little rifle, it shot particularly well with Nosler 35-grain Varmageddon loads. In Africa, that load accounted for a half-dozen animals, all one-shot kills, all with the bullet lodged under the hide on the far side.

On varmints such as prairie dogs, woodchucks, and marmots, the Hornet is plenty of gun, and shoots flat enough at least to a couple hundred yards. Coyotes are tough, but it’s powerful enough, with more range than can be wrung out of a .22 Magnum.

And, it has some specialized uses. Purist turkey hunters gnash their teeth and rend their garments over this but, after all, it is legal to use rifles on turkeys in several states. Doesn’t matter to me whether you approve or choose to participate. For those who do, the .22 Hornet is the perfect “turkey rifle.” Accurate enough for head shots, but powerful enough to anchor even the biggest gobbler with a well-placed body shot…without damaging much meat. My Dad was not a serious rifle guy and owned few. One was an early Oregon Kimber .22 Hornet. He loved to shoot prairie dogs with it. We still have it and, yes, Dad hunted turkeys with it. So have I!

Small varmint
Left to right: .17 HMR, .22 Long Rifle, .22 WMR, .22 Hornet. The .22 Long Rifle is irreplaceable for small game. For somewhat larger game and more range the .17 HMR and .22 Magnum are extremely effective but, above small game and below long-range varminting, Boddington believes the .22 Hornet is a solid choice.

The .22 Hornet is legal for deer in some states (usually under an “any centerfire cartridge” rule). Generally speaking, I think this is a bad idea but, with perfect shot placement, I’ve seen the Hornet take grownup whitetails very cleanly. More appropriate, and an ideal niche for this great little cartridge, is the often-oddball class of what I think of as “small big game.” In North America we were cheated in this category, with few options. The Hornet is ideal for thin-skinned animals such as lynx and bobcat, so is a fine tool for trappers and houndsmen. And it’s perfect for javelina. Usually not difficult to locate or stalk, the javelina is a uniquely American animal and makes an awesome mount. Weighing maybe 50 pounds, I can’t imagine a more perfect javelina rifle than a .22 Hornet.

jackrabbit-sized dik diks
The several varieties of jackrabbit-sized dik diks are among the smallest African antelopes. Their skin is paper thin and bones fragile; bullet damage is a serious concern. Harley Young used a .22 Hornet to take this excellent Damara dik dik, perfect cartridge and perfect shot.

Elsewhere, the utility expands. Africa has a full suite of small predators, and is blessed with a wide variety of pygmy antelopes. In deep forest a shotgun is the preferred tool, but in more open terrain a scoped rifle is almost essential. These animals are thin-skinned, and the standard plains game rifle does too much damage. My long-time boss “Pete” Petersen loved his .22 Hornets. He used them widely at home for varmints (and sometimes deer), but he always took a .22 Hornet to Africa…not only for the tiny antelopes and small predators, but for camp meat up to impala and reedbuck. I haven’t always taken a Hornet to Africa, but I’ve often borrowed a page from Pete and taken a Hornet, especially when a “special” pygmy antelope was on the menu.

blue duiker
The blue duiker is the smallest of the several forest duikers. Found only in heavy cover, shotguns are usually used. Boddington found the .22 Hornet a perfect tool and, amazingly, the 35-grain bullet entered, expanded, and was against the hide on the far side.

Several times I took a Hornet barrel for a Thompson/Center Contender (perfect). Other times I’ve borrowed Hornets from outfitters. Although still fairly popular over here, .22 Hornets are common in southern Africa, simply because they’re so useful. A couple of years ago in Namibia, my friend Harley Young wanted to take a Damara dik dik and a klipspringer to complete his “Tiny Ten.” Outfitter Barry Burchell had a nice Anschutz .22 Hornet…but little ammo. No problem, we spent a couple hours at his loading bench, whipped some up, and after checking zero Harley made two brilliant shots. 

Coastal Mozambique is blessed with several uncommon pygmy antelopes: Suni, red duiker, and blue duiker in patches of thick forest; and lots of oribis in the open pans. In the thick stuff we usually use a camp shotgun, but I thought a Hornet might be better. With a rifle in close cover, you must find a hole to thread the bullet through, but with a low-power scope you often can.

Livingstone’s suni
A spectacular Livingstone’s suni, taken in Mozambique with the CZ527 in .22 Hornet. The shot was through a little gap at about 60 yards, perfect performance with Nosler’s 35-grain bullet.

In 2018 I took a little CZ 527 in .22 Hornet with a little Leupold 1-4X scope. I would have preferred the traditional 45-grain bullet, but that particular rifle grouped best with Nosler Varmageddon with a light, fast 35-grain bullet. It was magic! Finding a clear path to shoot through proved easier with the scoped rifle than with a shotgun, and performance was perfect. Even on suni and the tiny blue duiker, the little 35-grain bullet opened nicely and was consistently lodged against the hide on the far side, dramatic effect with almost no damage. In just a few days I took excellent suni and both blue and red duiker in the forest. The same load accounted for oribi and reedbuck in the open, but I kept the shots within 100 yards.

Kimber .22
Boddington used his father’s old Kimber .22 Hornet to take this ugly spotted hog. Such an animal is really too big for the Hornet, but at closer range with a good rest, its accuracy allows precise brain shots, well-executed on this hog.

Daughter Brittany has been keeping her grandfather’s Kimber .22 Hornet, but we took it out of mothballs this spring in the Texas Hill Country. I had every intention of shooting a javelina with it, but I couldn’t bring myself to; I couldn’t figure out what I might do with it! Wild hogs are another story; we were on Tom Hammond’s Record Buck Ranch, a place with a major pig problem. The challenge: The .22 Hornet isn’t really enough gun for hogs…you gotta be careful.

.22 Hornet
This young hunter is about to drop the hammer on a javelina. The collared peccary is just about the only “small big game” in the United States, not great to eat but a unique and interesting American game animal. The .22 Hornet is a near-perfect cartridge.

Houston Erskine and I stalked a deer feeder one morning and caught a couple of hogs. The ugliest spotted hog I ever saw was going at it eagerly, not a large pig but too big for a .22 Hornet…unless you’re careful. I got Dad’s Hornet on sticks at about 70 yards, and found the base of the ear in the crosshairs. At the shot the hog went over backwards and never moved. That’s being stung by a Hornet, what a wonderful little cartridge!

THE PERFECT ZERO?

 By

Craig Boddington

Previously, this column discussed the process of “sighting in.” If you’re happy, then we’re done; it’s time to head for the deer stand! We’re going to assume we have enough accuracy to reliably hit a deer’s vital zone at whatever distance we might shoot. The vital zone of even a small deer offers about an eight-inch target, so extreme accuracy isn’t essential for much for field shooting.

Jarrett-300groups
Boddington’s Jarrett wears a Leupold scope with a CDS turret, calling for a 200-yard zero. The left-hand group was shot at 200 yards, ensuring a good starting point for dialing with a 180-grain SST load.

Hey, I love tiny groups because they instill confidence, and I love to ring steel at long range. However, I’m unlikely to shoot at a game animal much past 400 yards. Most of my shots at game are much closer, and many of us rarely need to reach past 200 yards. Theoretically, if your rifle is producing one-inch groups at 100 yards (one Minute of Angle or “MOA”), then it should produce two-inch groups at 200 yards, four-inch groups at 400 yards, and so on. Considering the size of the vital zone, one MOA is more accuracy than essential.

Boddington’s rifles wear iron sights
: Some of Boddington’s rifles wear iron sights…and a few have worn barrels. Either way, extreme accuracy isn’t possible…and unnecessary for a lot of field shooting. With excellent paper-plate accuracy at 50 yards, this old .300 Savage would be just fine to 150 yards…if Boddington could see the front sight well enough!

Actual groups usually get larger as distance increases, so I don’t mind having more accuracy than I really need, but let’s be reasonable and practical. Even today, with the best rifles, optics, and ammo ever, not all rifles can produce one MOA accuracy.

Tight groups instill
Tight groups instill great confidence, but sub-MOA groups aren’t essential for most field shooting. This Savage 100 .30-06 is more than field-ready: The excellent right-hand group is two inches high at l00 yards; the bullet will be “on” at about 200 yards

Not a train smash; 1.5 MOA is plenty for most field shooting. Most modern rifles will do at least this well, and that’s “good enough,” at least at normal field ranges. I have older rifles that are “two MOA” rifles.  Also not a problem. I hunt with them, but only in close-range situations! With such rifles, I usually do my zeroing on ten-inch paper plates. In that context, “paperplate accuracy” is good enough! Regardless of the accuracy you have to work with, and the ranges you might consider shooting, you still must decide exactly where to leave your rifle zeroed before you head afield.

TRAJECTORY CURVE

Traditionally, most of us leave a rifle zeroed slightly high at 100 yards, to take advantage of the bullet’s trajectory. Here’s how this works: There are two straight lines, line of bore and, slightly above, line of sight. Both are straight, but the path of the projectile is curved. Gravity starts working on any projectile as it leaves the muzzle, and air resistance slows it down. As distance increases, the projectile falls ever more quickly, eventually striking the ground.

: Gordon Marsh of LG Outdoors
Gordon Marsh of LG Outdoors at his bench, checking handload velocities with a Lab Radar, a wonderfully accurate tool that uses Doppler radar to measure bullet speed.

If line of bore and line of sight remain parallel, the bullet will never cross the line of sight and no zero can be achieved. Using sight adjustments, we actually zero so the line of bore and line of sight slightly converge. Line of bore remains straight, while the projectile’s path is curved. With line of bore tilted slightly upward relative to line of sight, the projectile’s curving path crosses line of sight twice, once at short range and again farther out. In between these points the projectile’s path will be above the line of sight. The point at which this distance above line of sight is greatest is referred to as “mid-range trajectory.”

Springfield Waypoint in 6.5mm
On the bench with a Springfield Waypoint in 6.5mm PRC. The scope is a Zeiss 2-12X; the big 56mm objective requires the scope (line of sight) to be considerably higher than line of bore. Height of the scope is a critical factor in good ballistics data and must be correct.

The steepness of the trajectory curve depends on velocity and projectile aerodynamics. In establishing final zero, we usually try to use that curve to best advantage, extending the ranges at which we can shoot without having to worry about holding off the target (above or below) to compensate for that curving trajectory.

There should be little mystery about the actual trajectory curve. For generations, printed ballistics charts have yielded this information, usually suggesting various sight-ins at 100 yards (the bullet’s first crossing of line of sight), and telling us greatest height of trajectory, and where the dropping projectile crosses line of sight again, and yielding bullet drop at various ranges as the decline accelerates.

On the bench with a Jarrett rifle
On the bench with a Jarrett rifle in .300 Win. Mag. Boddington’s California range is hot in summer, cool in winter, and always near sea level. When figuring ballistics data for open-country hunts, he estimates expected temperature and elevation. This works fine for the ranges he shoots at game, but guesswork isn’t good enough for extreme-range shooting.

Today, ballistics programs and smartphone apps yield the same information, and allow us to input altitude, temperature, humidity, barometric pressure, and more, all of which increase in importance as range increases. Printed data assumes a standard measurement of line of sight over line of bore (height of scope). Electronic data allows us to input this. With the larger (higher-mounted) scopes in vogue today, that measurement must be accurate.

PH Poen van Zyl and Texan John Stucker
PH Poen van Zyl and Texan John Stucker at the bench in Mozambique, checking zero on Stucker’s .375. With a crocodile hunt in the offing, we adjusted our zeros very carefully to be exactly dead-on at 50 yards.

All data, whether printed or electronic, assumes that the starting velocity is correct. Barrels vary in length, and there are “fast” barrels and “slow” barrels. For truly accurate data, it’s essential to use a chronograph to check the speed of your load in your rifle.

gnarly spike on his Kansas farm.
Boddington was delighted to take this ancient and gnarly spike on his Kansas farm. The rifle is a Mossberg 464 with AimPoint red-dot sight. The rifle was zeroed at 50 yards, the shot about the same distance

Fortunately, the vital zone of a big-game animal remains a large target! None of this stuff matters much if your goal is to shoot your buck from a favorite treestand, like in thick timber at my Kansas farm. When I’m setting up a rifle for an open-country hunt, you bet I measure height of scope and check velocity! Effects of altitude and climatic factors are less critical…until you get past normal shooting distance, or you have extreme variations. In preparation for fall hunts, I do my summer shooting in hot, low country. I make a guess on anticipated altitude and climatic factors, run the data, and zero accordingly. This has proven adequate for the ranges I shoot at game…but isn’t precise enough for extreme-range work!

DEAD-ON OR SLIGHTLY HIGH?

Whether at 25, 50, or 100 yards, a dead-on zero with a modern rifle cartridge is the first time the bullet crosses the line of sight. Farther on, it will be above the line of sight and, as the curve steepens, it will cross line of sight again somewhere downrange.

It is not true that “dead-on at 25 yards” will be close to “on” at 100 yards. This is possible with slower cartridges, and with iron sights or low-mounted scopes. With faster cartridges and higher-mounted scopes, I’ve found that a 25-yard zero will usually strike too high at 100 yards. A 50-yard zero comes closer, especially with low-mounted sights. I often zero iron-sighted rifles and scoped big-bores at 50 yards and call it done, knowing that I’m unlikely to use such rifles much past 100 yards. However, with today’s big scopes, I find that a 50-yard zero is usually three or four inches high at 100 yards. This puts the second crossing of the line of sight ‘way out there, and creates a mid-range trajectory as much as six inches above line of sight. For me, this increases risk of shooting over an animal (or hitting too high).

John Stucker and Boddington with Boddington’s Mozambique croc
John Stucker and Boddington with Boddington’s Mozambique croc, taken in September 2021 with a Blaser .375 H&H. The Nile crocodile must be taken with either a brain or spine shot. All rifles were zeroed dead-on at 50 yards; Boddington’s four-hunter group took four big crocs…anchored with one shot each.

For close-range work, there’s nothing wrong with a 100-yard zero. Depending on cartridge, “dead-on at 100” will be on again at 150 to 175 yards, with little mid-range-rise. More common is to zero a “couple of inches high” at 100 yards. You can study ballistics charts and programs, and you should. Depending on your cartridge (and load, and bullet), a zero of two to 2.5 inches high at 100 yards will put you dead-on somewhere between 200 and 300 yards. You shouldn’t have to hold low at closer range, and you shouldn’t have to hold over until nearly 250 yards. In my youth, Jack O’Connor was our greatest gunwriter. His consistent advice was to zero “two to 2.5 inches high” at 100 yards. I believe his formula remains sound, and that’s the way I usually zero for general-purpose use. Most important to me: I never establish a 100-yard zero any higher than that, because of the risk of shooting over at “medium” range!

DIALING THE RANGE

These days, dial-up turrets are all the rage, and they change the game. Some systems require either a 100 or 200-yard zero as the starting point. If you intend to dial the range, then I assume you may be shooting at some distance. I don’t like a 100-yard zero in open country, simply because you must start holding over (or dialing) at fairly close range. With today’s optics, dialing is precise, but fraught with human error: You must dial correctly and, if you don’t shoot, you must remember to dial back to zero. (Trust me, everybody forgets now and then!)

Leupold CDS
With a good scope, dialing the range or holdover is the most precise method, but the data must be correct and verified by shooting at actual distance. This CDS turret is for a .300 Weatherby Magnum load at a measured 3185 fps with 180-grain SST. The 6000 feet elevation and 30-degree F temperature reflect anticipated hunting conditions.

I’ve used several systems with good results, but a favorite is Leupold’s Custom Dial System (CDS), with turret calibrated to my load at a stated altitude and temperature. On these, again, I strike an average of most likely conditions. My CDS is based on a 200-yard zero. At 250 yards I’ll usually hold slightly high on the shoulder, keeping it simple and taking advantage of that large vital zone. I normally don’t consider dialing until about 300 yards.

If your system is based on a 200-yard zero, then you should check zero at the actual distance, so your starting point is verified as correct. Then, if you’re serious about shooting at longer ranges, you need to verify your data all the way out. This is a stumbling block for many who don’t have ready access to a “long” range. Sorry, whether published or electronically generated, data cannot be considered valid until verified by shooting at actual distance. The farther you might consider shooting at game, the more critical this becomes!

Rigby 7x57 groups
: This Rigby 7×57 groups about 1.5 MOA with this load, a 139-grain Interlock at 2700 fps. Zeroed two inches high at 100 yards, the bullet will be “on” at 200 yards, so a dead-on hold will work to about 225 yards.

Finally, if you’ve traveled some distance—by any means—it’s important to check zero when you arrive at your hunting destination. There’s no consistency about how much (or how little) rattling around may cause a shift in point of impact, so it’s always worth checking. On long, tough hunts, I’ll usually check zero every few days, for sure if the rifle has been dropped! I also recommend checking zero after an inexplicable miss. It’s terrible for the ego, but great for peace of mind to know for sure it was your fault! When planning ammo for a distant hunt, factor in enough to check zero about three times!